


Tape-In Installation Guide
-
Prep and Clarify
10 minView image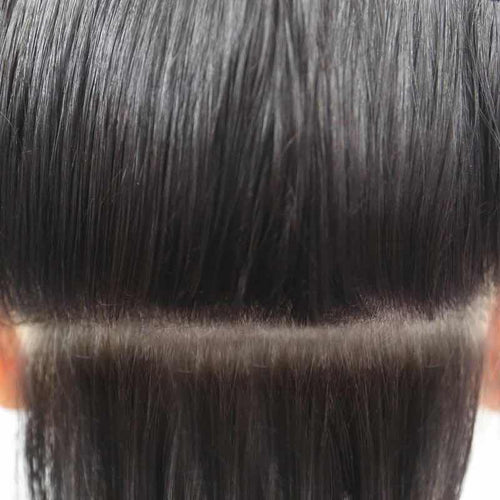
-
Section the Hair
2 minView image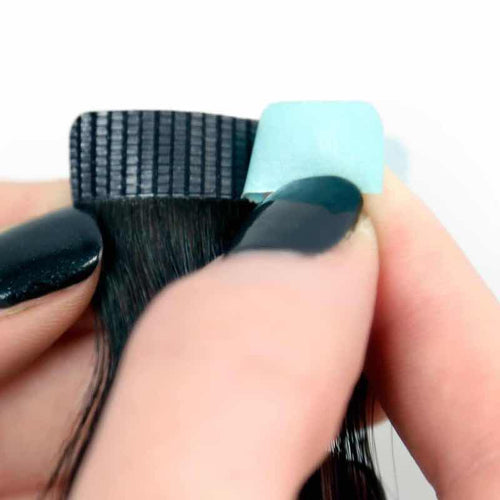
-
Place the First Weft
2 minView image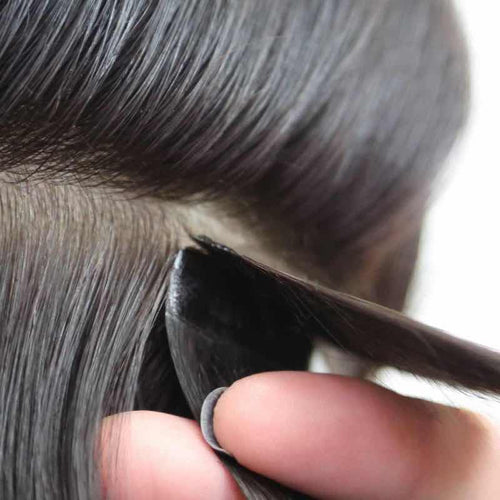
-
Sandwich with a Second Weft
2 minView image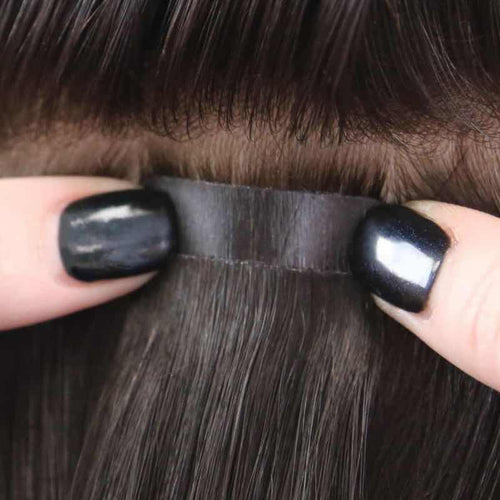
-
Work Up and Blend
4 minView image


For 3B to 4C hair, blow the hair out smooth first: tape bonds to the hair shaft, not the curl pattern, so a stretched base holds far better. Use slightly wider sections, and make sure the hair is fully dry before you place a single weft.
Pro Tips
- Clarify first: any oil, silicone, or conditioner at the root will break the bond
- Start two fingers down from the front hairline so the tabs never show
- Use a brick-layer pattern so no two bonds stack directly on top of each other
- Press the full length of the tab, not just the middle, for an even seal
- Wait 24 to 48 hours before the first wash to let the adhesive cure
Frequently Asked Questions
With proper care, tape-ins last 6-8 weeks before needing reapplication. The hair itself can be reused 3-4 times with new tape.
Yes. Wait 48 hours after installation, then use sulfate-free shampoo. Wash in a downward motion and avoid conditioner near the bonds.
Yes. Remove with bond remover, clean the wefts, apply fresh tape strips, and reinstall. Most clients get 3-4 reapplications from one set.
When installed and removed correctly, tape-ins cause minimal to no damage. Never pull them out without bond remover.
Yes. Use heat protectant and keep tools below 350F. You can color the extensions but consult your stylist first.
Most full installations use 40-60 pieces (4-6 packs). Fine hair may need fewer, thick hair may need more.
How to Install Clip-In Hair Extensions in 5 Easy Steps
-
Section the Hair
2 minView image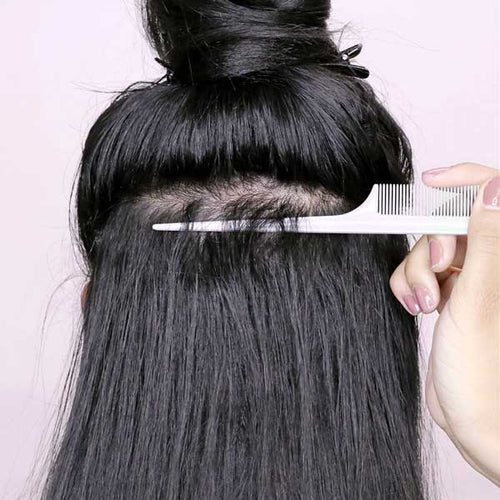
-
Tease and Prep the Roots
1 minView image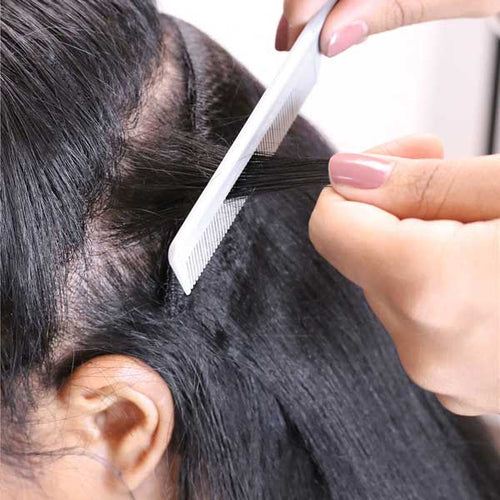
-
Attach the First Weft
2 minView image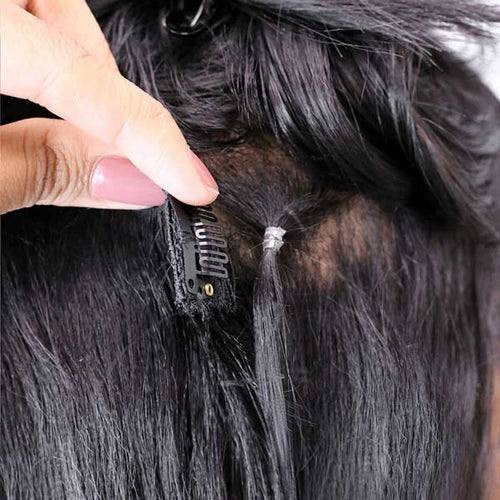
-
Layer Additional Wefts
5 minView image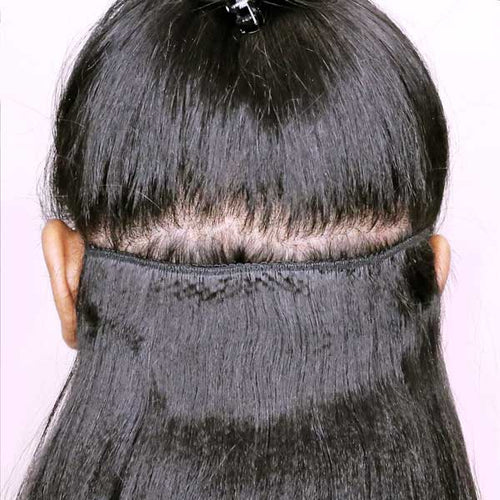
-
Blend and Style
3 minView image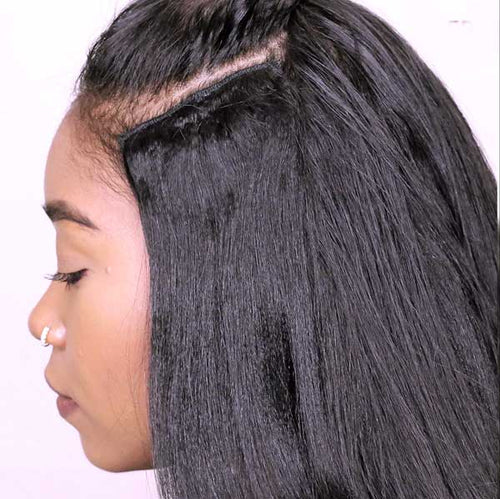


For 3B to 4C hair, work on stretched or blown-out hair and take slightly thicker sections. Your natural volume is an advantage here: it hides the weft line better than fine hair does. A detangling spray before clipping makes blending much easier.
Pro Tips
- Tease the roots lightly first: clips grip texture, not slick hair
- Never place a weft above the temple line, or the clips will show when you tie your hair up
- Anchor the middle clip before the sides so the weft sits flat
- On textured hair, add a bobby pin at each end of the clip line for extra hold
- Take them out before bed: sleeping in clip-ins tangles the wefts and pulls at your roots
How to Install Clip-In Hair Extensions in 5 Easy Steps
Quality Remy clip-ins last 6-12 months with proper care. Limit heat styling and wash every 15-20 wears.
No. Always remove clip-ins before sleeping. Sleeping with them causes tangling, matting, and can damage both the extensions and your natural hair.
Yes. Use the thinner wefts and tease roots before clipping for extra grip. Seamless clip-ins sit flatter for fine hair.
A standard set has 7-10 pieces. For added volume use a full set. For just length, you may only need the wider bottom wefts.
Remove before swimming or intense workouts. Chlorine, salt water, and sweat can damage the hair and loosen the clips.
Order a color ring or contact our team with a photo of your hair in natural light. We can recommend the best match.
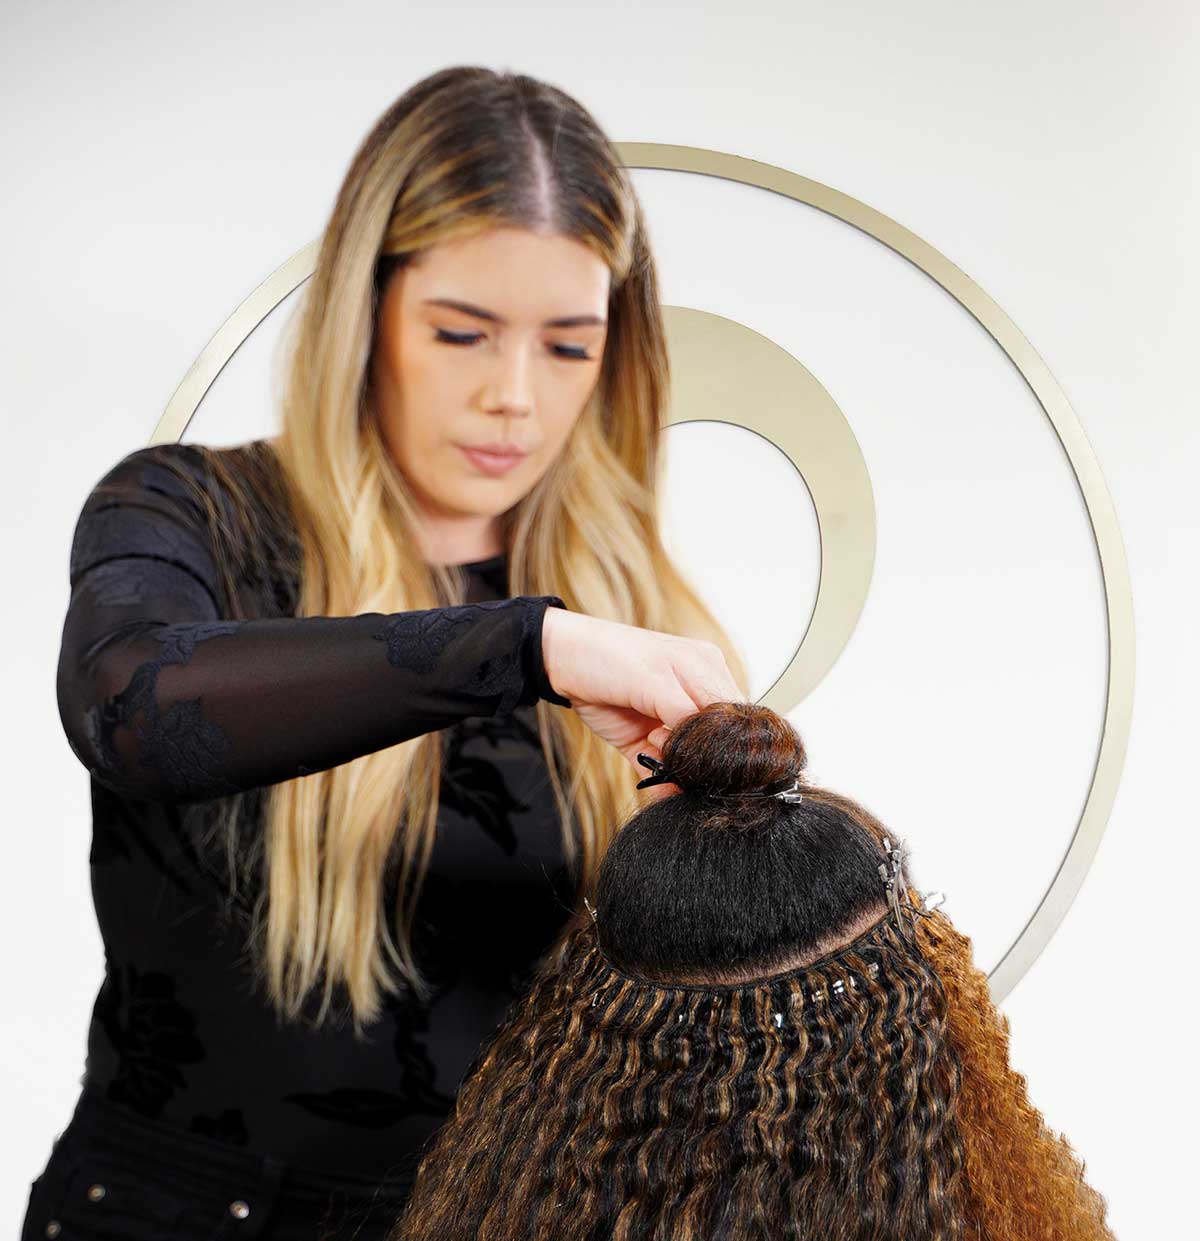
How to Install Weft Hair Extensions in 5 Easy Steps
-
Prep and Section the Hair
3 minView image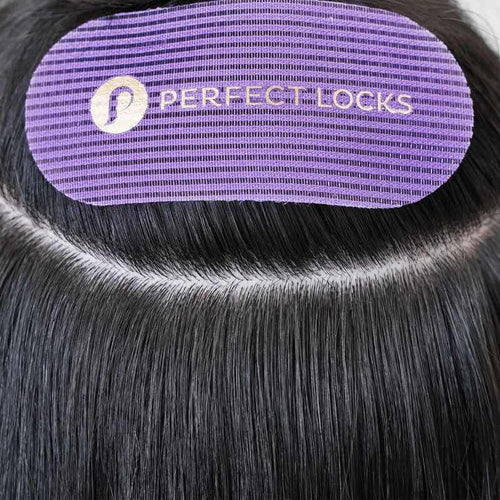
-
Create a Foundation
5 minView image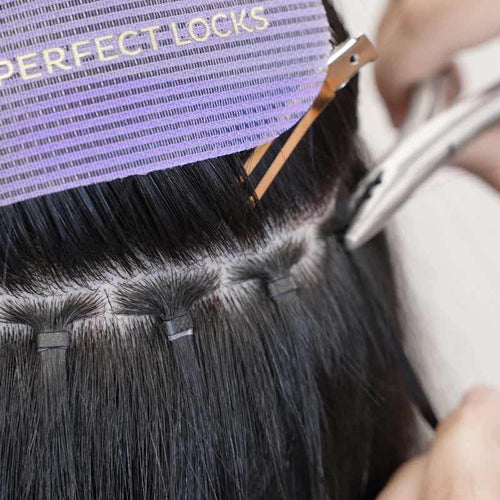
-
Measure and Prepare the Weft
2 minView image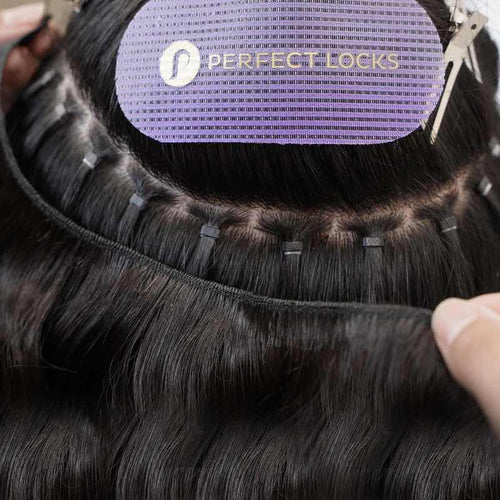
-
Install the Weft
5 minView image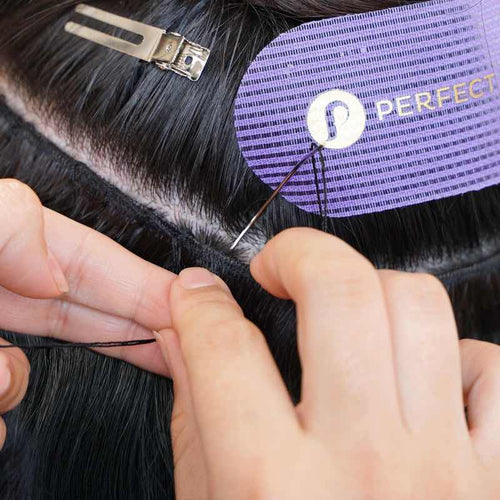
-
Blend and Style
3 minView image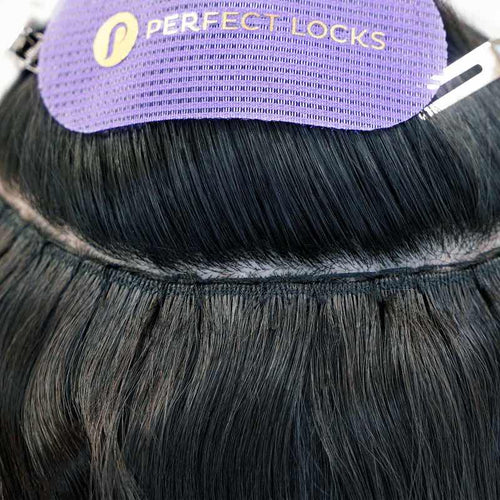


For natural hair, use a flat braid pattern rather than cornrows to reduce tension. Leave out enough natural hair at the perimeter for seamless blending.
Pro Tips
- Measure weft against the track before cutting
- Use a curved needle for easier sewing
- Keep tension even to prevent pulling
- Leave perimeter hair out for blending
How to Install Weft Hair Extensions in 5 Easy Steps
A professional sew-in lasts 8-10 weeks. After that, remove the thread, wash your braids, and reinstall to maintain hair health.
When installed with proper tension and flat braids, sew-ins cause minimal stress. Never braid too tightly at the hairline.
Yes. Wash every 1-2 weeks with diluted sulfate-free shampoo applied between the tracks. Blow dry on low heat to ensure braids dry completely.
Most full sew-ins use 2-3 bundles depending on desired fullness and head size.
Yes. Use a flat braid pattern instead of tight cornrows. Leave enough perimeter hair for blending.
How to Install a Halo Hair Extension in 5 Easy Steps
-
Section Your Hair
1 minView image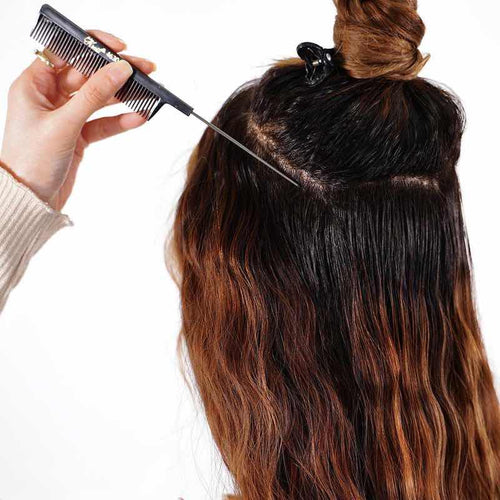
-
Place the Halo Extension
1 minView image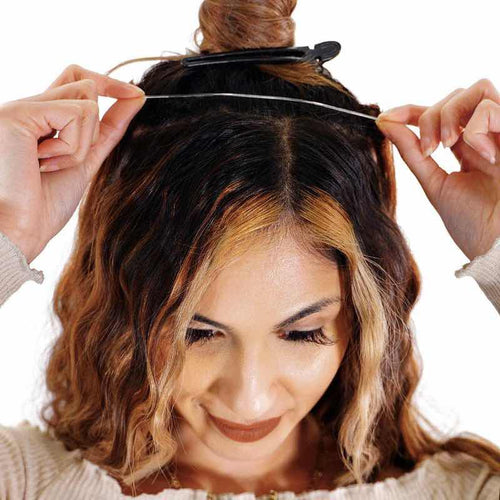
-
Adjust for Comfort and Security
1 minView image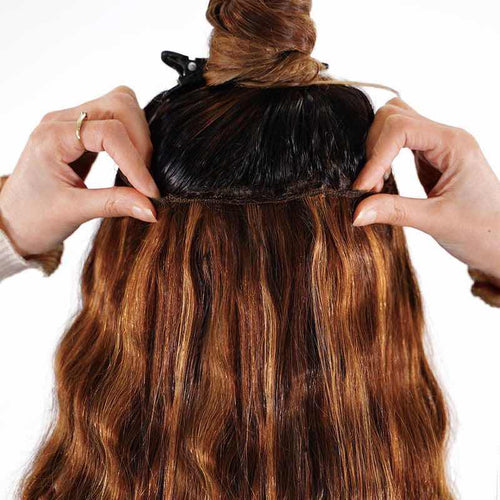
-
Release and Blend Your Hair
1 minView image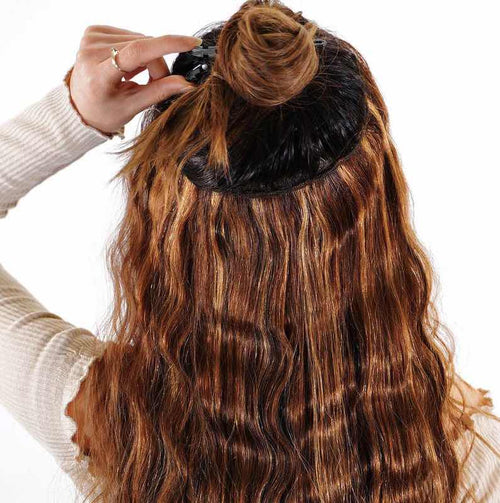
-
Style as Desired
2 minView image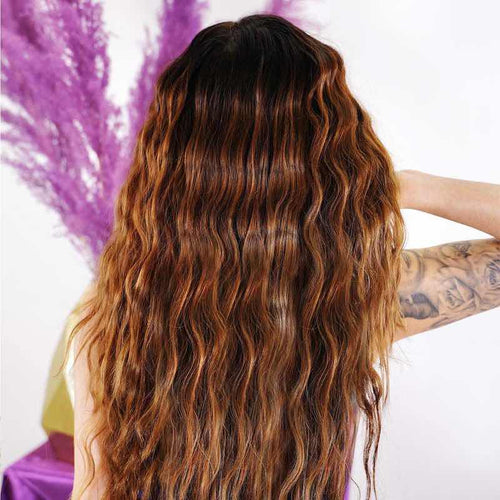


Halo extensions work beautifully on textured hair. Position the wire slightly lower on the crown and use a wide-tooth comb to blend curls over the wire.
Pro Tips
- Adjust wire tension for secure but comfortable fit
- Create a slight tease at the crown to hide the wire
- Use a wide-tooth comb to blend, not a brush
- Great for temporary wear - weddings, events, photos
How to Install a Halo Hair Extension in 5 Easy Steps
Measure around your head at the widest point. Small fits 21-22 inches, Medium fits 22-23 inches, Large fits 23-24 inches. When between sizes, go larger.
Yes. Halos are the gentlest method since there is no attachment to your natural hair. Remove before sleeping and store flat.
When positioned correctly about 1 inch from your hairline with natural hair pulled over the top, the wire is completely hidden.
Yes. Position the wire slightly lower on the crown and use a wide-tooth comb to blend curls over the wire.
Gently bend the wire to follow your head contour using smooth curves. Never use sharp bends. Extend at the adjustment points if it feels tight.
Install Guide for Fusion I-Tip Hair Extensions (Beaded Method)
-
Sectioning & Preparation
3 minView image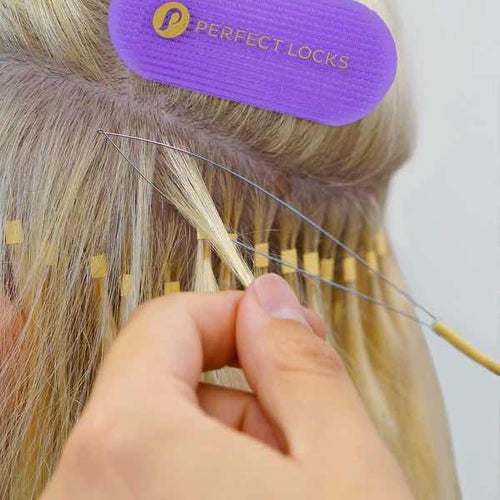
-
Bead Placement
2 minView image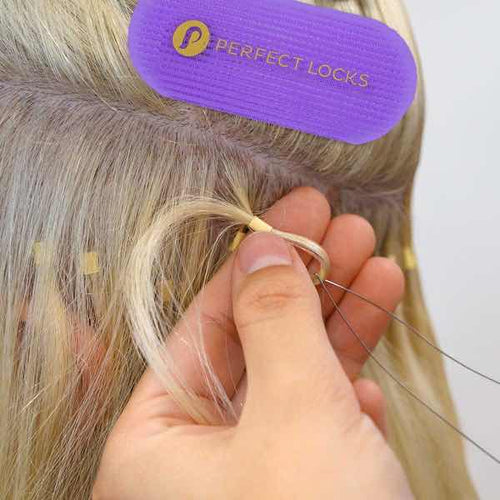
-
Insert the I-Tip Extension
1 minView image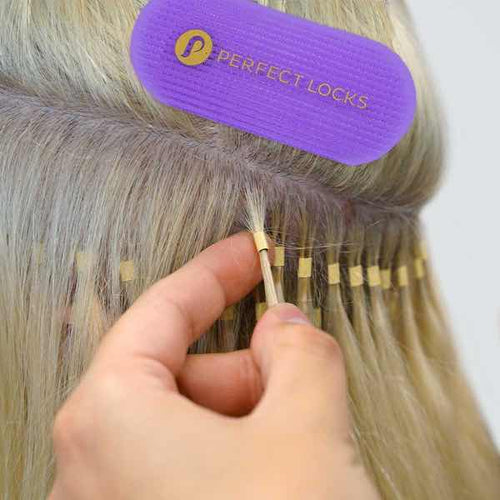
-
Securing the Beads
1 minView image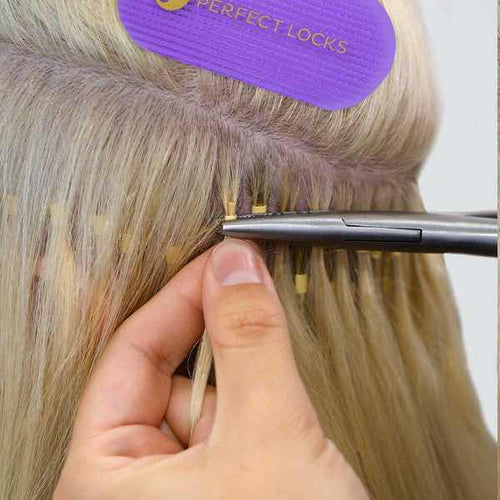
-
Repeat and Blend
10 minView image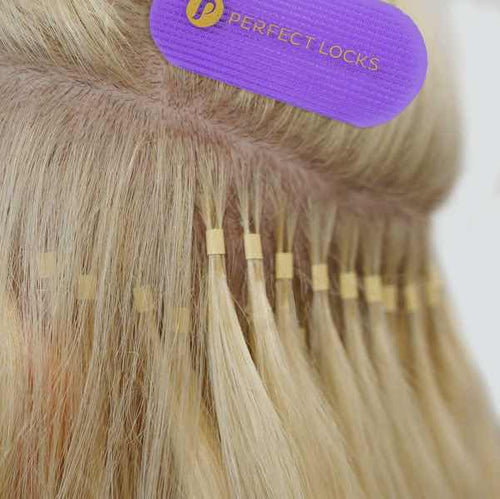


For textured hair, use the cold fusion (bead) method rather than heat bonds. Thread natural hair through the bead, insert the I-tip, and crimp flat. No heat damage to natural curl pattern.
Pro Tips
- Use a loop tool for faster bead threading
- Crimp beads flat, not round - flat sits closer to scalp
- Space bonds evenly for natural weight distribution
- Keep bonds at least 1cm from the scalp
- Check crimp tightness by gently tugging each strand
Install Guide for Fusion I-Tip Hair Extensions (Beaded Method)
I-tip beaded extensions last 3-4 months with move-ups every 8-12 weeks as your natural hair grows out.
Cold fusion (bead method) causes no heat damage. Proper installation with correct spacing and tension protects your natural hair.
A full head typically requires 100-150 strands depending on hair density and desired volume.
Yes. Use heat protectant and keep tools below 350F. Keep hot tools away from the beads.
Your stylist uses pliers to uncrimp each bead, then slides it off. The process takes 30-60 minutes and causes no damage when done correctly.
I-tips use a cold bead method with no heat. U-tips use a keratin bond melted with a hot tool. I-tips are gentler.
Beaded Weft Installation Guide
-
Thread the Beads
3 minView image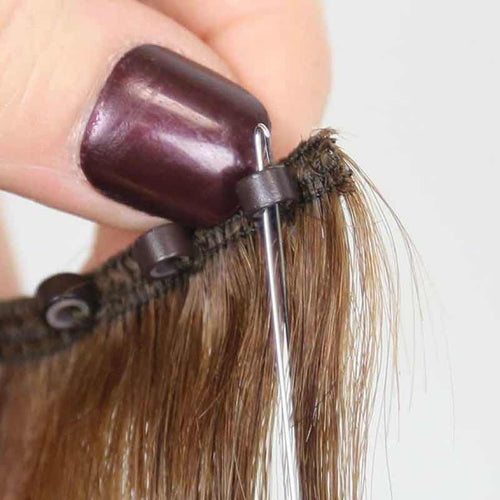
-
Insert the Weft
2 minView image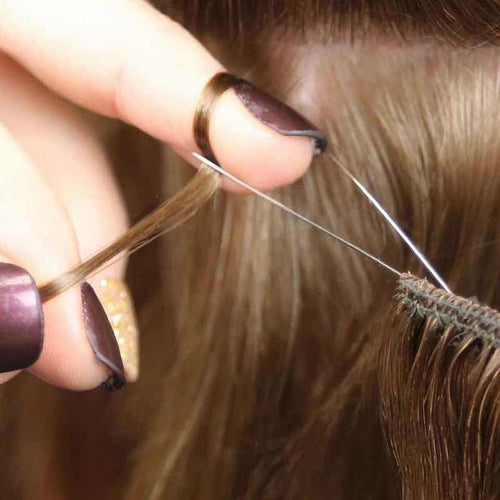
-
Clamp the Beads Closed
2 minView image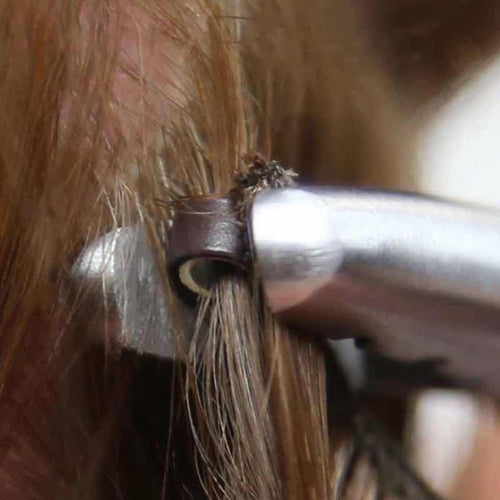
-
Check the Row
3 minView image
-
Repeat in Other Sections
5 minView image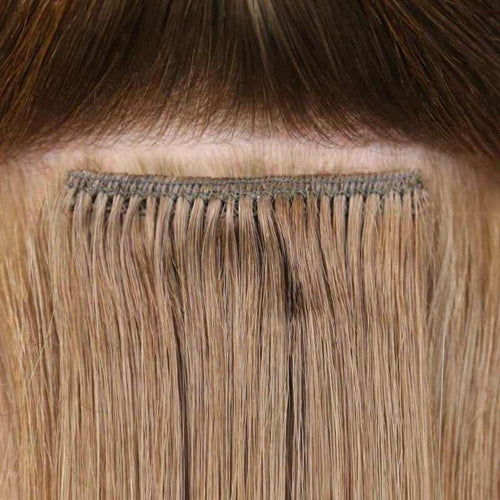


Beaded wefts are ideal for textured hair - no braiding, no heat, no glue. The bead row sits flat against the scalp and works with all curl patterns from 2A to 4C.
Pro Tips
- Thread beads onto the wire before positioning
- Crimp beads from the outside, not from below
- Space beads about 1cm apart
- Check weft band sits flush against the bead row
- Move-ups every 8-12 weeks
Frequently Asked Questions
A beaded weft uses a wire and micro-ring beads to attach a continuous weft strip. No braids, no heat, no glue.
The weft itself lasts 12+ months. Move-ups are needed every 8-12 weeks to reposition the bead row.
Yes. Beaded wefts are ideal for all textures including 4A-4C because no braiding is required.
Most installations use 2-3 rows. One row adds subtle volume, two rows provide a full look, three rows are for maximum density.
When installed correctly with proper tension and spacing, beaded wefts cause minimal to no damage. The wire distributes weight evenly.
Get the Perfect Look
Ready to Level Up?
Take Your Skills Further
Go beyond the basics with certified courses, hands-on Bay Area training, and our Pro Stylist program - built for stylists who want to master every method.
Browse Online Classes