The Beginner's Guide to Hair Extensions
Getting Hair Extensions for the First Time
You've decided to try hair extensions - exciting! But if you're feeling a little overwhelmed by all the options, terminology, and "what ifs," you're not alone. We hear from first-time extension wearers every day, and the same questions come up again and again.
Will they look natural? How do I know what color to get? Will they damage my hair? What if I waste money on the wrong ones?
These are all valid concerns, and we're here to put your mind at ease. After helping thousands of women find their first set of extensions over the past 20 years, we've learned exactly what beginners need to know - and what they can skip.
"I remember how nervous I was buying my first extensions. Would they match? Would people be able to tell? That experience is exactly why we offer free color matching and a 30-day return policy. We want you to feel confident, not anxious, when you're starting your hair journey."
- Priyanka Swamy, Founder of Perfect Locks
This guide covers everything you need to know before buying and wearing your first extensions - no fluff, just the practical advice that actually matters.
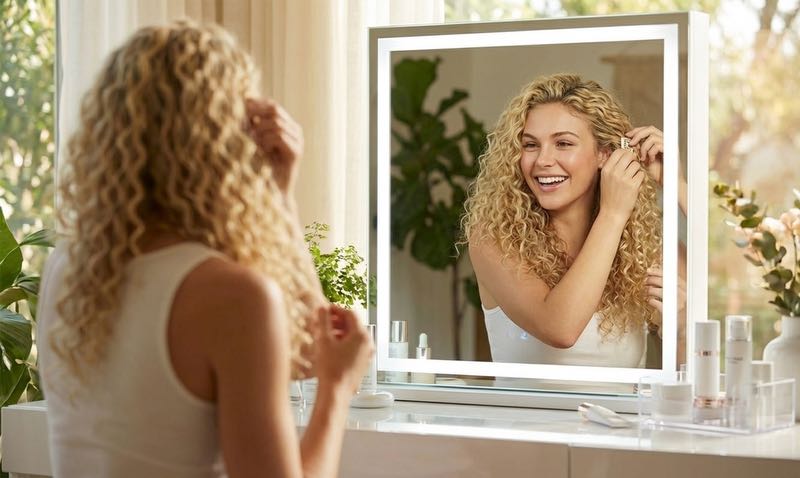
How to Apply Clip-In Extensions
Step-by-step tutorial for beginners
The Best Extensions for Beginners
Let's start with the most important question: which type should you get?
For your first extensions, we always recommend clip-ins or halo extensions. Both are temporary, require no salon visit, and cause zero damage to your natural hair - which makes them the safest place to start.
Why beginners love clip-ins and halos
- No commitment - wear them when you want, skip them when you don't
- No salon required - apply at home in 10-30 seconds to 15 minutes
- Zero damage - no adhesive, no heat bonding, no braiding
- Forgiving - placed wrong? Remove and try again instantly
- Low risk - if they don't work out, you haven't committed to a salon process
- Learn at your own pace - understand how extensions work before going semi-permanent
When beginners should consider something else
- You want to sleep, swim, or work out with extensions in - tape-ins or wefts are better suited
- Daily application feels like too much effort - semi-permanent methods eliminate that routine
- You have very short hair (under 6") - some methods blend better than clip-ins on very short lengths
- You want full coverage for thick hair - a multi-row sew-in may give better results
Types to Consider

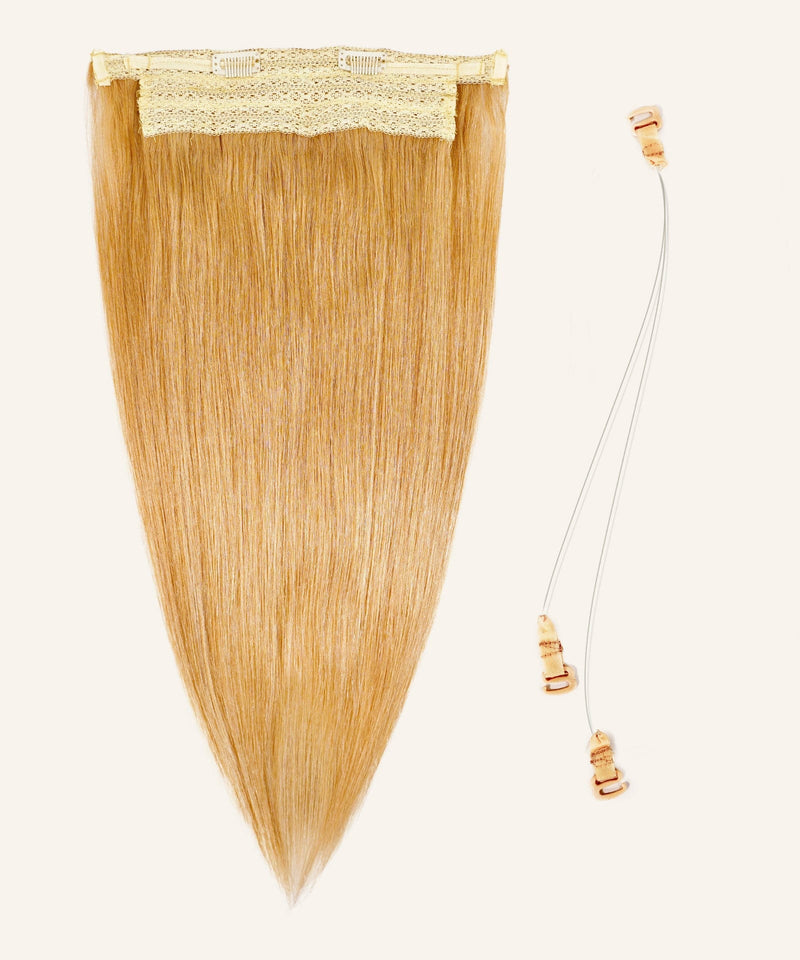
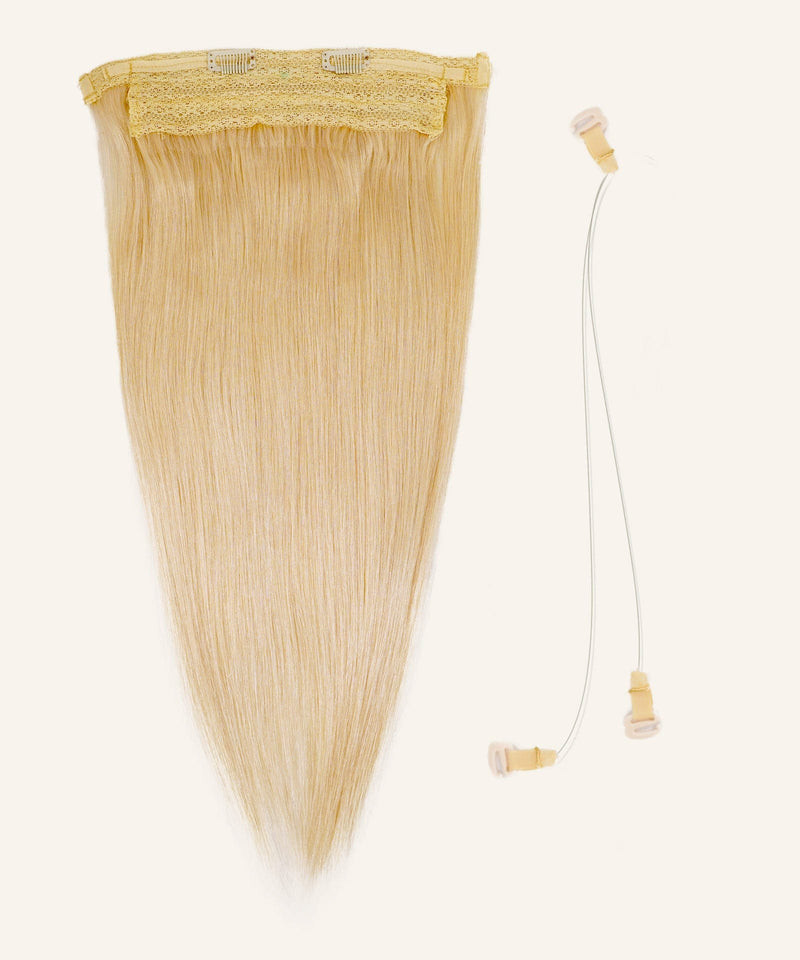
Clip-Ins Most Popular
Best for: Perfect for those wanting flexibility - volume for events, occasional wear, or testing extensions before commitment.
- Wear Time
- Daily on/off
- Application
- 5-10 minutes
- Easiest application method
- No commitment

Halos Beginner Favorite
Best for: Perfect for extensions newcomers, special occasions, or anyone wanting instant glamour without commitment or damage.
- Wear Time
- Daily on/off
- Application
- Under 60 seconds
- No clips or adhesives
- Fastest application

Tape-Ins Best Seller
Best for: Active lifestyles with regular salon access. Perfect for those who want long-term, daily wear extensions.
- Wear Time
- 6-8 weeks between maintenance
- Application
- 1-2 hours
- Completely undetectable when applied correctly
- Reusable for multiple applications
Why clip-ins are perfect for beginners
- Zero commitment - Put them in when you want, take them out when you're done
- No salon required - Apply them yourself at home in 10-15 minutes
- No damage risk - They don't use adhesive, heat, or braiding
- Forgiving of mistakes - Placed one wrong? Just unclip and try again
- Great for learning - You'll understand how extensions work before committing to semi-permanent options
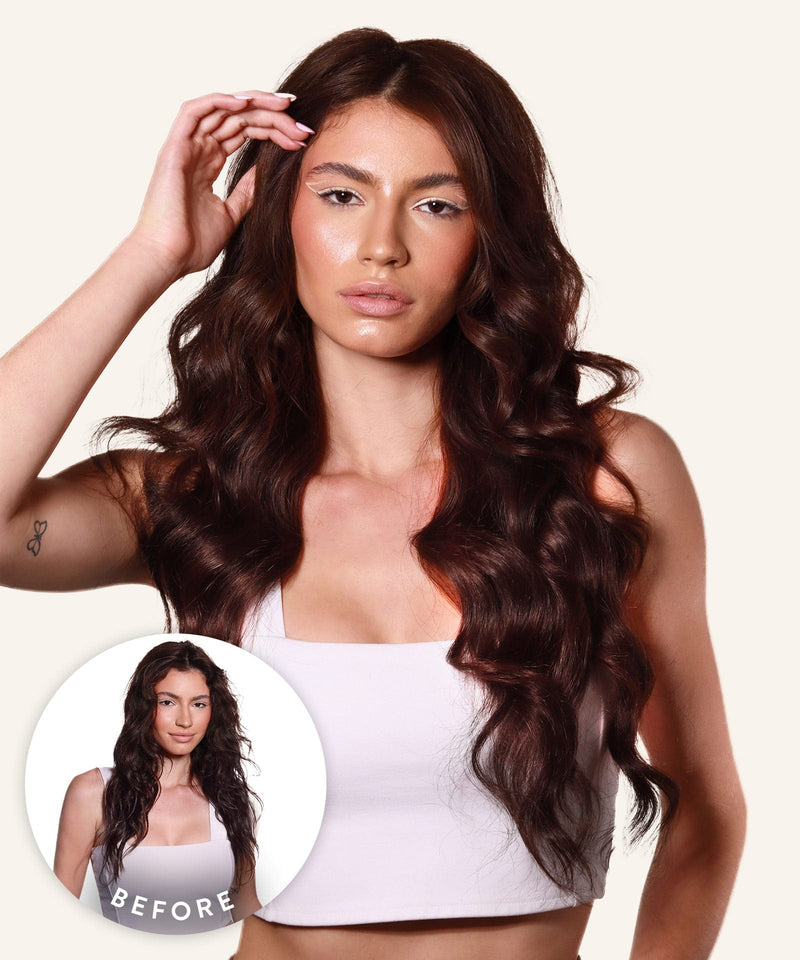
Most of our customers start with clip-ins and many never feel the need to try anything else. They're not a "beginner" option you'll outgrow - they're a legitimate, high-quality method that celebrities and stylists use regularly.
Halo Hair Extensions
The easiest transformation in hair extensions - literally seconds to put on, seconds to take off, zero damage. Our Pe...


Why halo extensions are the easiest option
If you want even simpler application, halo extensions are hard to beat. They sit on an invisible wire that rests on your head - no clips, no attachments, just position and go. Application takes literally 30 seconds once you get the hang of it.
Halos are especially great if you have fine hair or a sensitive scalp, since there's zero tension on your natural hair.
Seamless Clip-In Hair Extensions
The ones nobody can tell you're wearing. Our seamless clip-in hair extensions use an ultra-thin skin weft that lies f...


Our recommendation: If you've never worn extensions before, start with a clip-in set. They give you more flexibility in how you wear them and help you learn the basics of blending and styling. Once you're comfortable, you can explore other methods if you want longer-lasting results.
| Feature | Clip-Ins | Halo | Tape-Ins |
|---|---|---|---|
| Best For | All beginners | Fine hair, quick looks | Ready to commit |
| Application Time | 10-15 minutes | 30 seconds | Salon only |
| Daily Removal? | Yes - no damage | Yes - no damage | No - stays in 6-8 weeks |
| DIY Friendly? | Yes | Yes | No - needs stylist |
| Sleep In? | No | No | Yes |
| Swim/Workout? | Remove first | Remove first | Yes |
| Learning Curve | Easy - 2-3 tries | Easiest - instant | N/A - stylist applies |
| Our Pick for First-Timers | Recommended | Recommended | After clip-ins |
How to Choose Your First Extensions
Now that you know which type to get, let's talk about the details that actually matter: color, length, and weight.

Matching your color
Color matching is the number one concern for beginners - and the number one reason extensions look unnatural when they don't match well. Here's how to get it right:
Step 1: Identify your base color
Look at your hair in natural daylight (not bathroom lighting). What's the dominant color? Ignore highlights or lighter pieces for now - focus on the main shade.
Step 2: Check your undertones
Hair isn't just "brown" or "blonde" - it has undertones that can be warm (golden, copper, red) or cool (ash, silver). Extensions that match your level but not your undertone will look off.
Step 3: Consider your ends
Your ends are often lighter than your roots from sun exposure and washing. Since extensions blend with your ends, you may need a shade slightly lighter than your root color.
Free color matching: Not sure what shade you need? Send us a photo of your hair in natural lighting and we'll recommend the best match. We look at every request personally - it's not automated. Get your free color match.
What if you're between colors?
If you're torn between two shades, go with the lighter one. You can always tone extensions darker, but you can't lighten them without bleach (which we don't recommend for beginners).
Choosing your length
First, measure your current hair length - from your crown (top of your head) down to your ends. This tells you how much length you'll actually be adding.
General guidelines:
- Want subtle length? Add 2-4 inches beyond your natural hair
- Want noticeable length? Add 4-6 inches
- Want dramatic length? Add 6+ inches (but make sure the weight is appropriate)
Important: If your natural hair is short (above shoulders), don't jump to 22" extensions. The transition will look unnatural. Stay within 4-6 inches of your current length for the most realistic blend.
Check our visual length guide to see exactly where each length falls.
Understanding extension weight
Extensions are measured in grams, and the weight you need depends on your natural hair density and the look you want.
Weight guidelines for clip-ins:
- 100-120 grams: Light coverage, adding some length and volume (good for fine hair)
- 120-160 grams: Standard fullness, works for most people
- 160-220 grams: Maximum volume and thickness (good for thick hair or dramatic looks)
If you have fine or thin hair, more isn't better. Heavy extensions can look unnatural and put unnecessary stress on your hair. Our seamless clip-ins are specifically designed for finer hair - they're lighter weight with thinner wefts that lay flat.
Before You Apply: Preparation Tips
You've got your extensions - now what? A little preparation goes a long way toward making them look natural and last longer.
Prepare your natural hair
- Wash and dry completely - Extensions grip better on clean hair, and wet hair can damage the wefts
- Skip heavy conditioner at the roots - Too much slip makes clips slide out
- Brush out all tangles - You want a smooth base to work with
- Optional: Add texture - A little dry shampoo or texturizing spray at the roots helps clips grip, especially on fine hair
Gather your tools
You don't need much:
- A mirror (two mirrors if you want to see the back)
- Sectioning clips to hold hair out of the way
- A tail comb for clean parts
- A brush - we recommend a loop brush designed for extensions
Understand the pieces
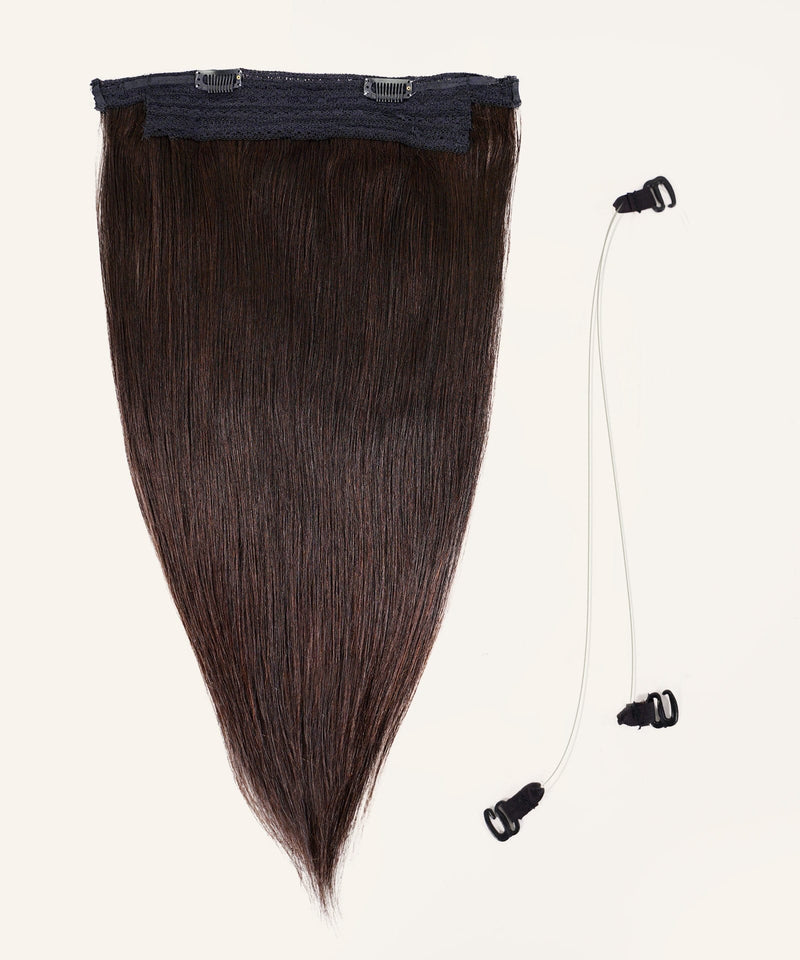
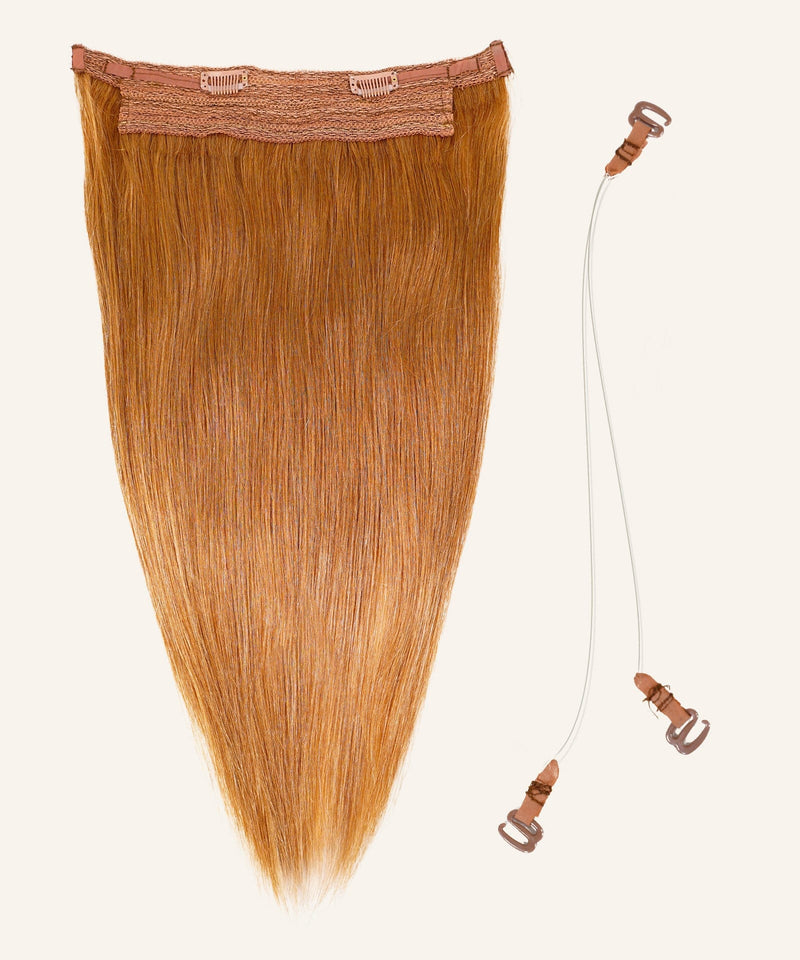
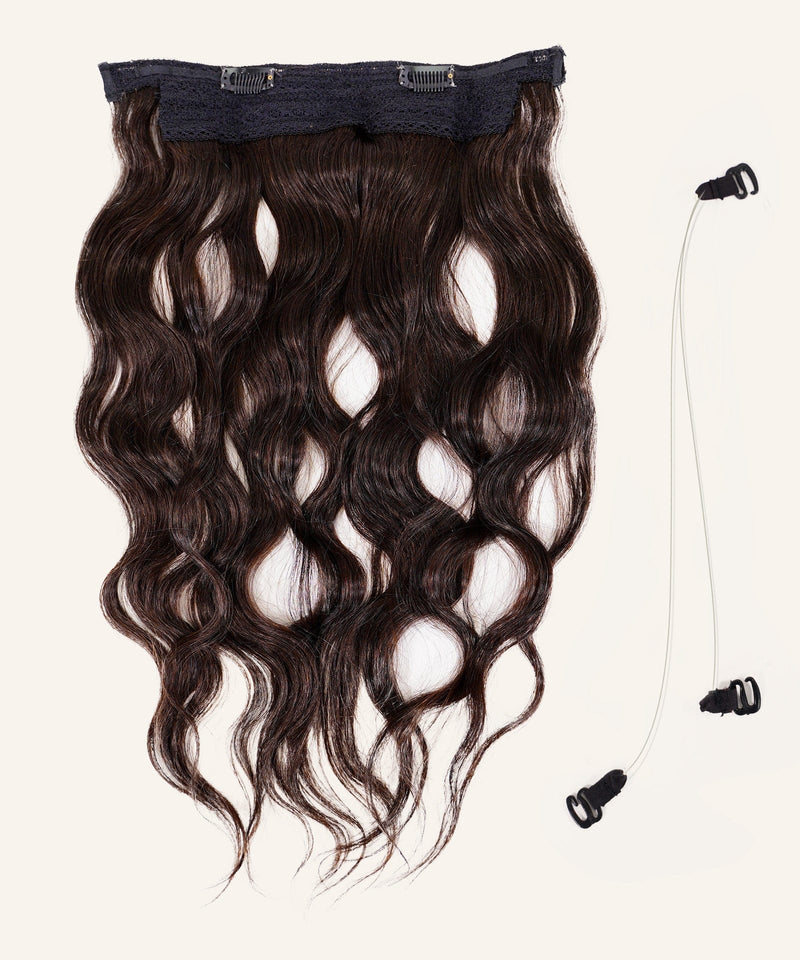
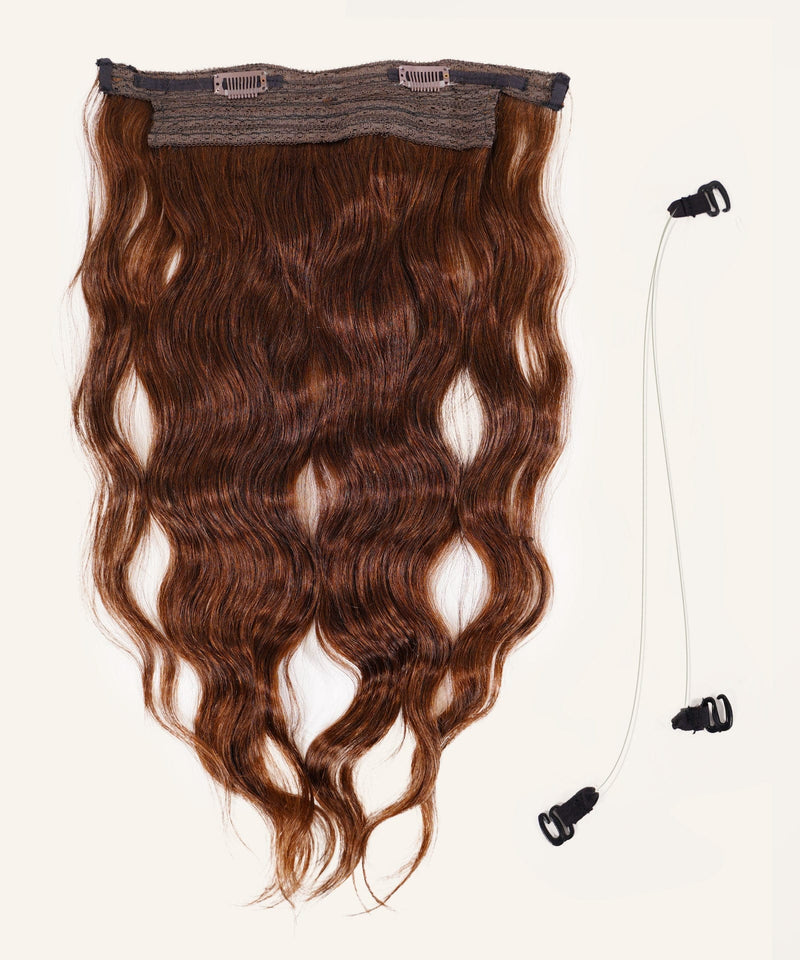
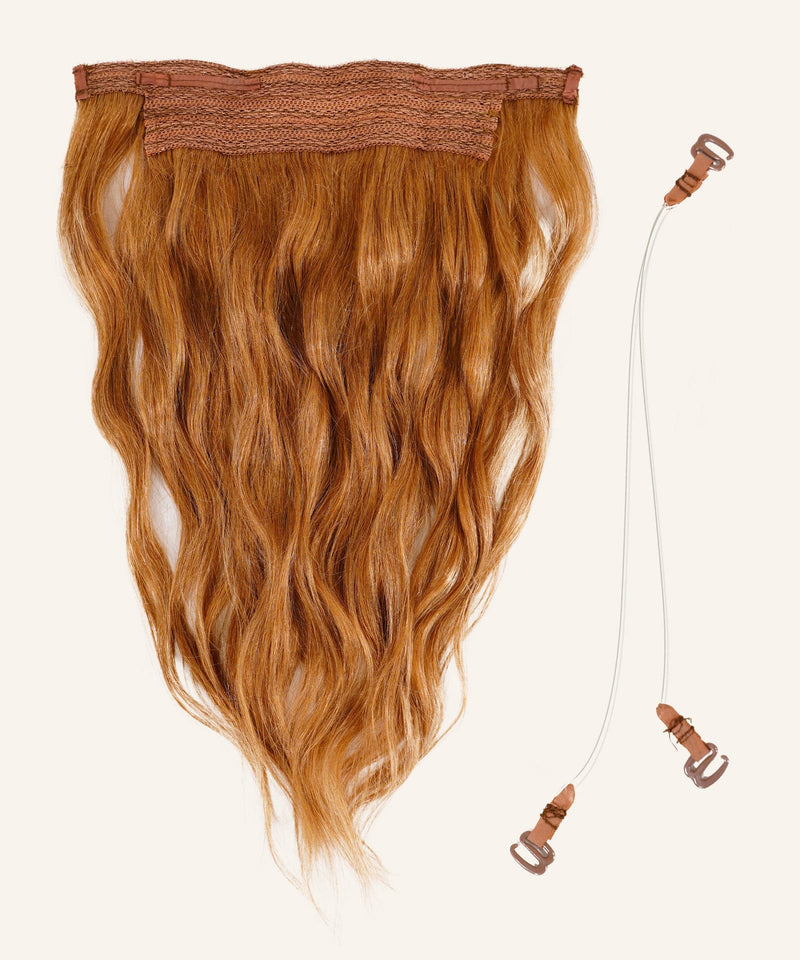
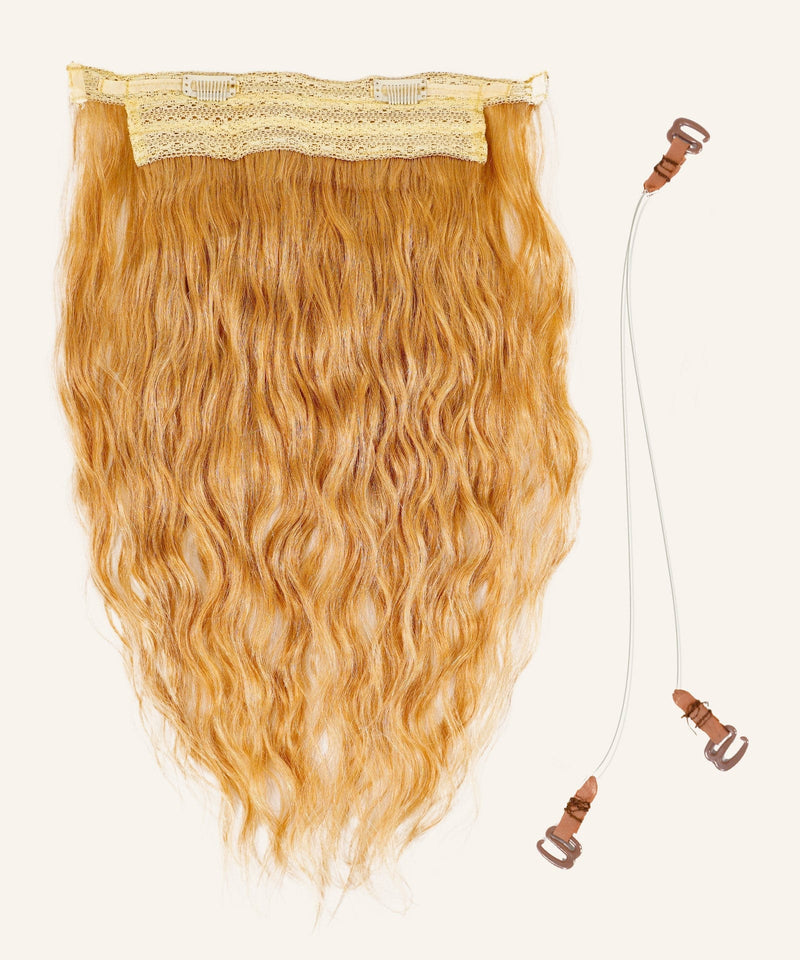
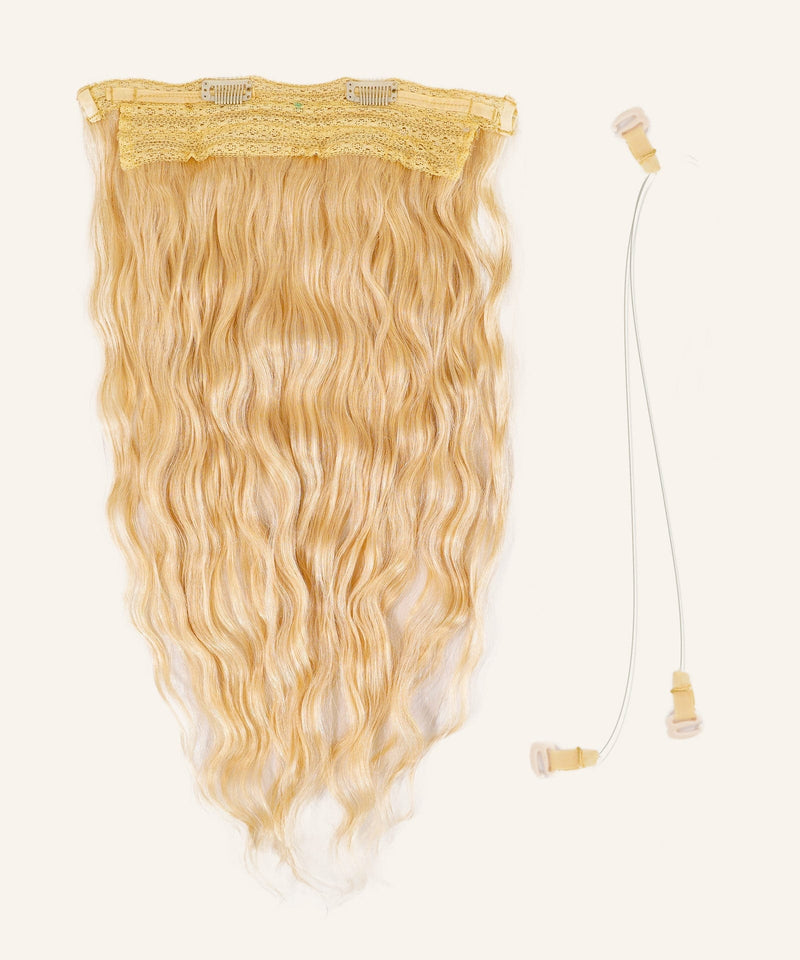
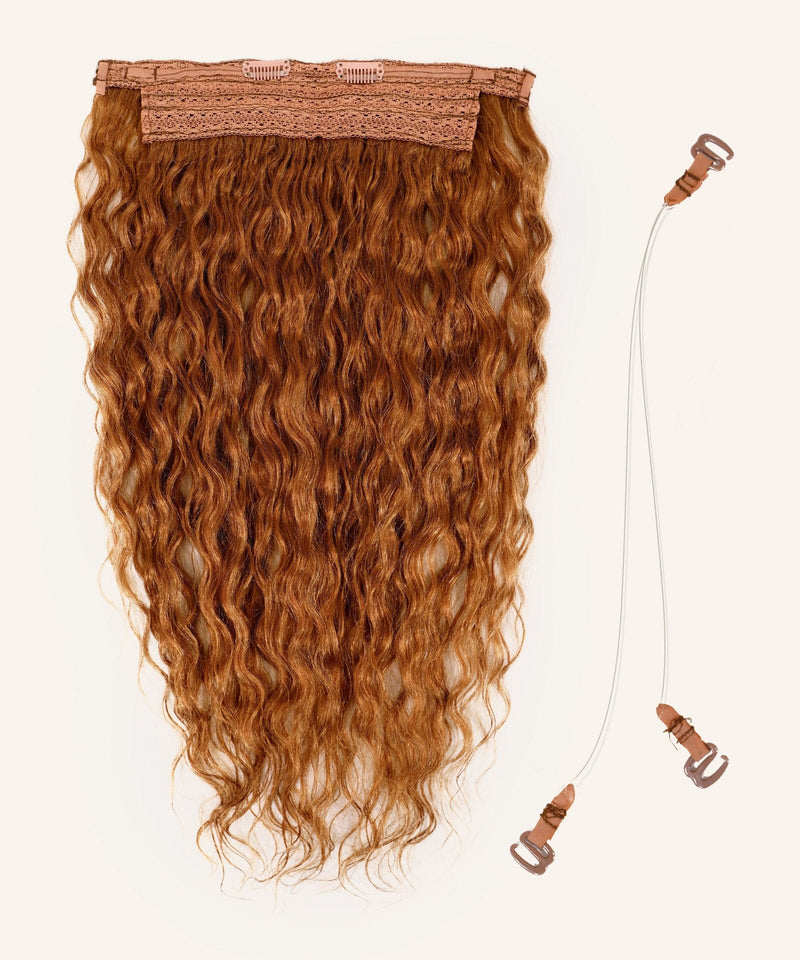
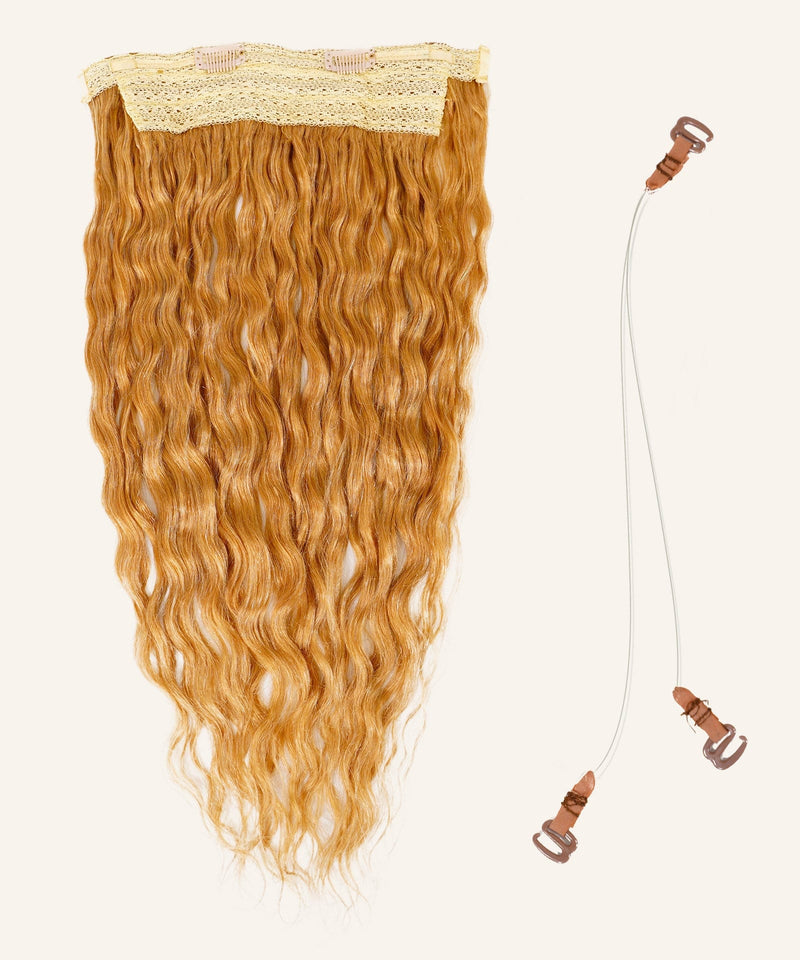
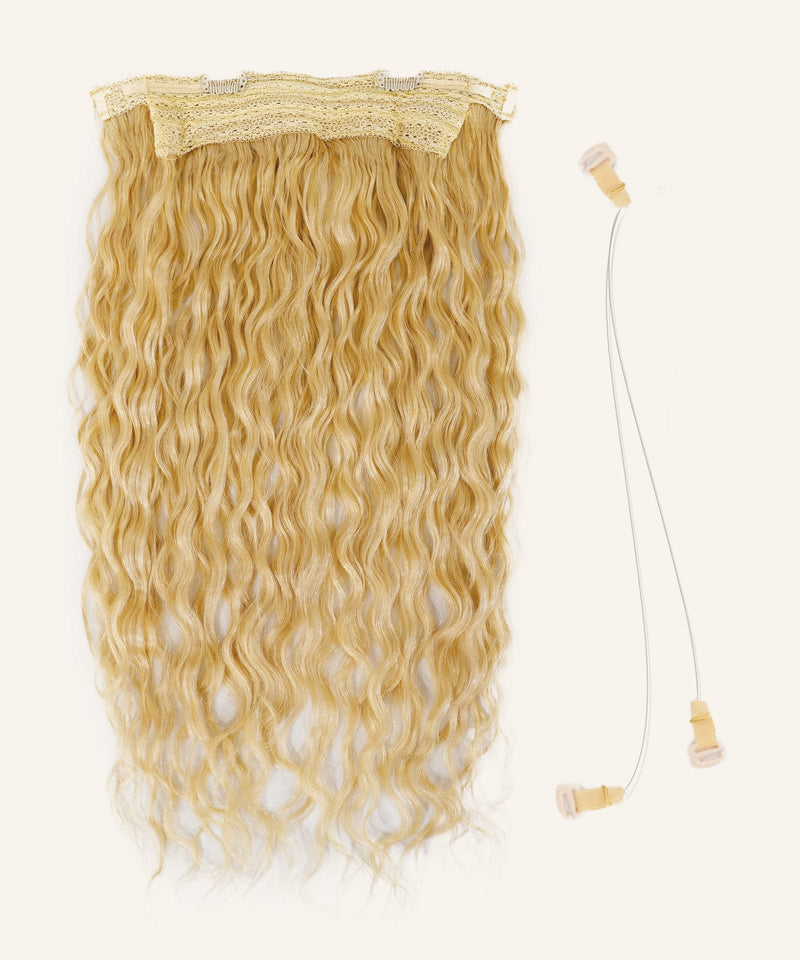
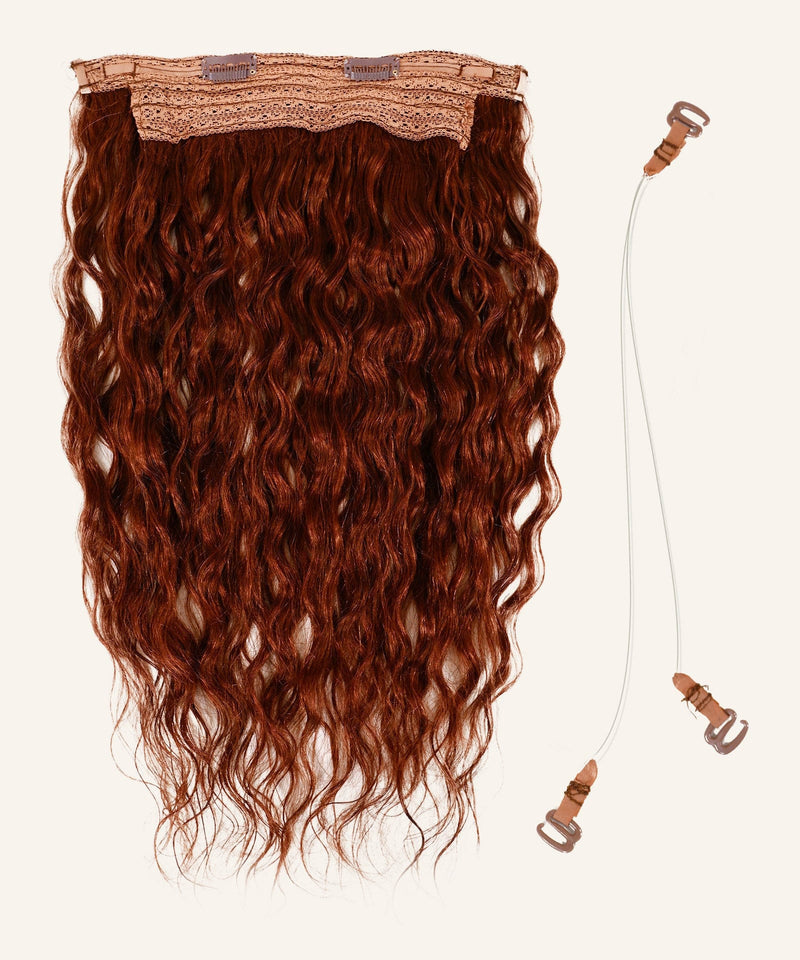
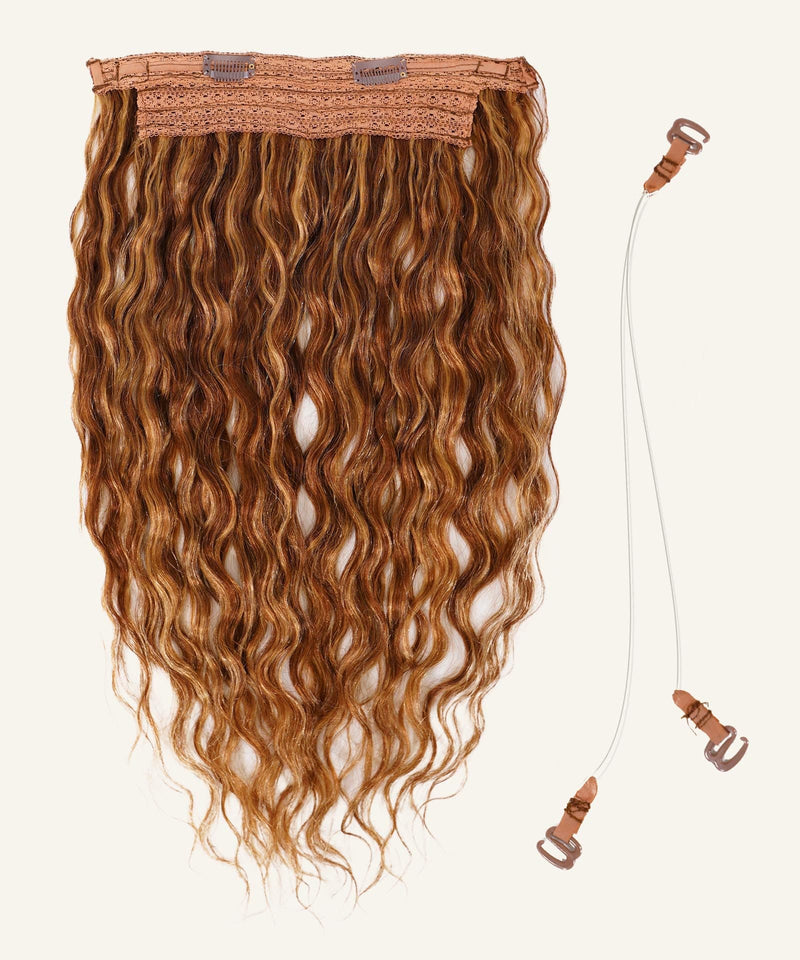
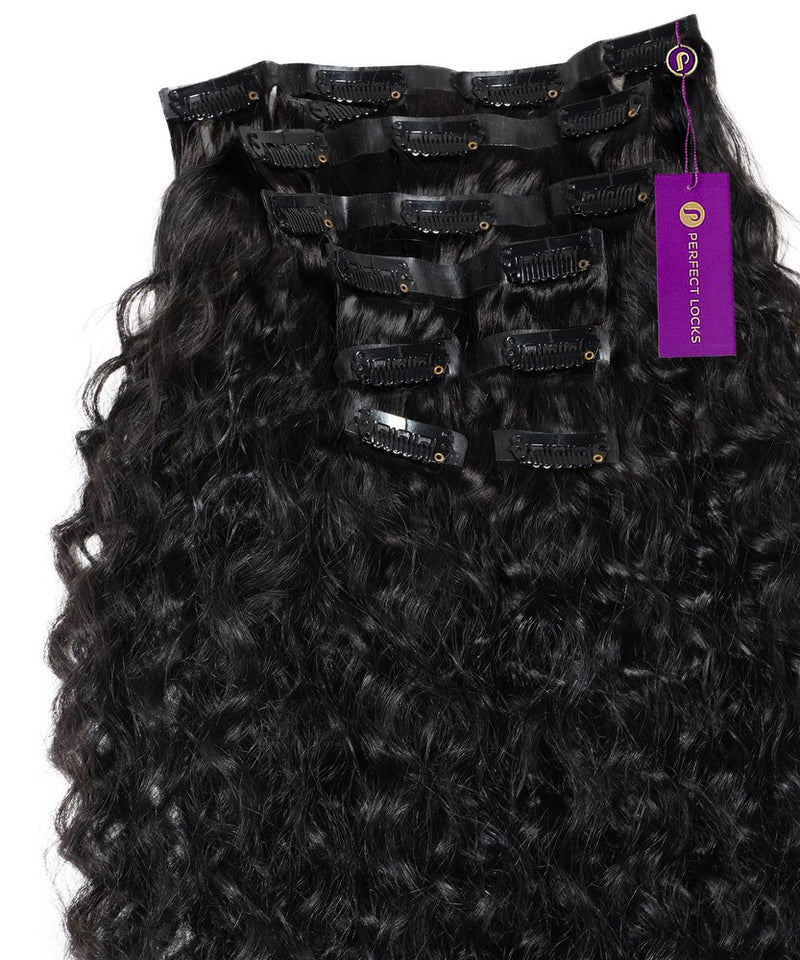
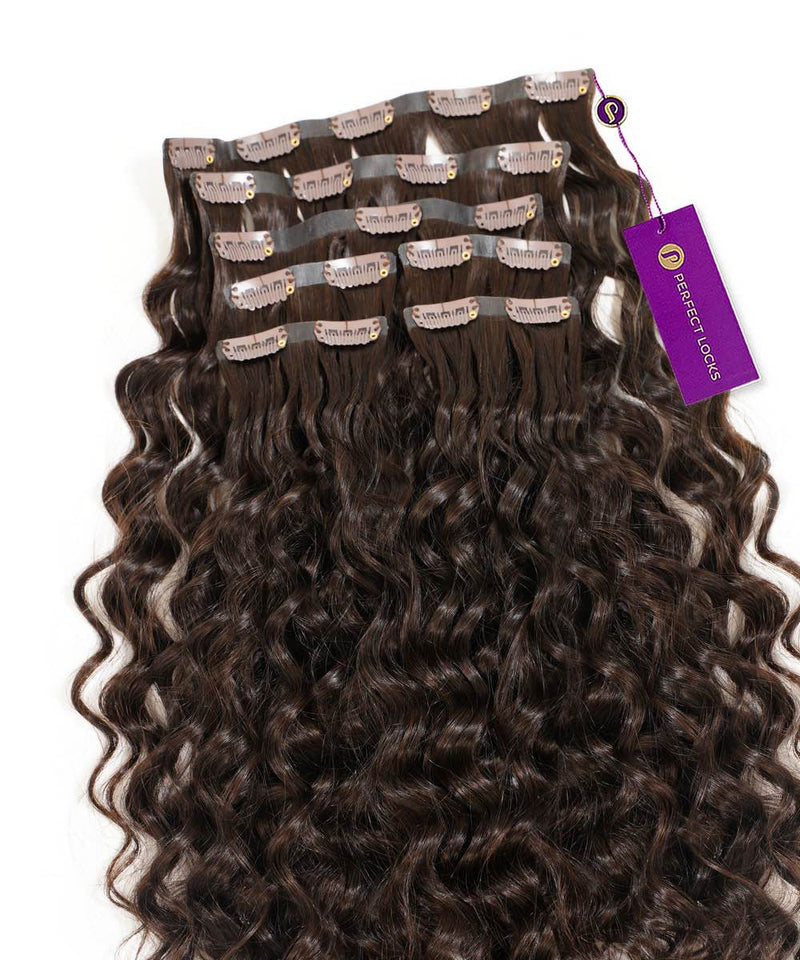
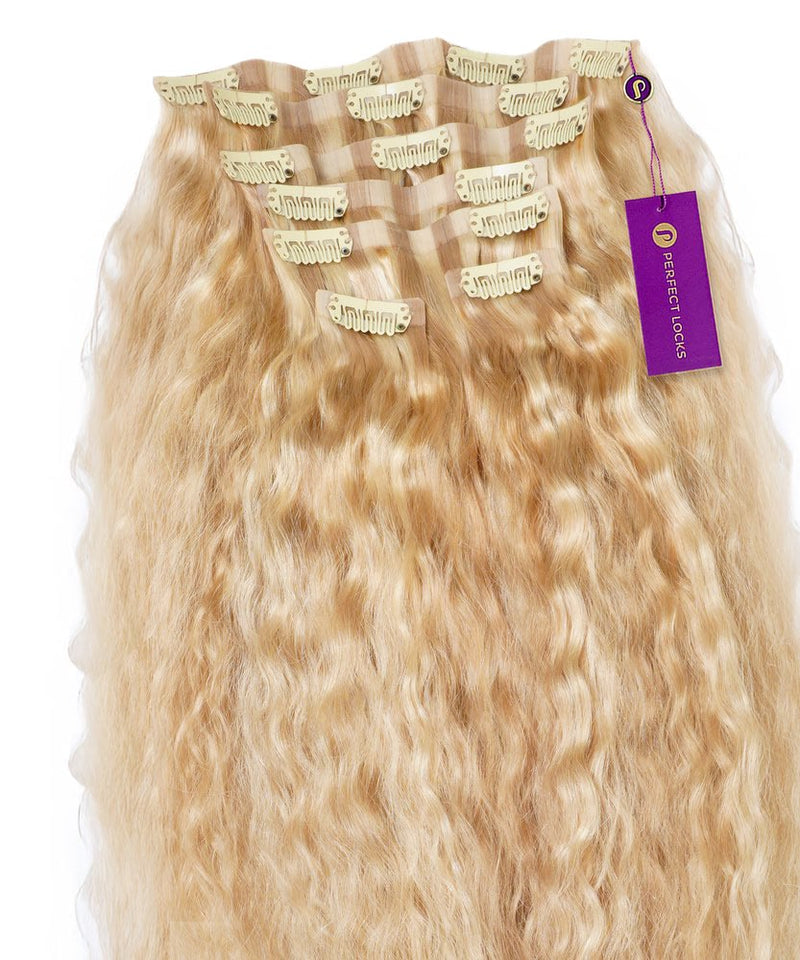
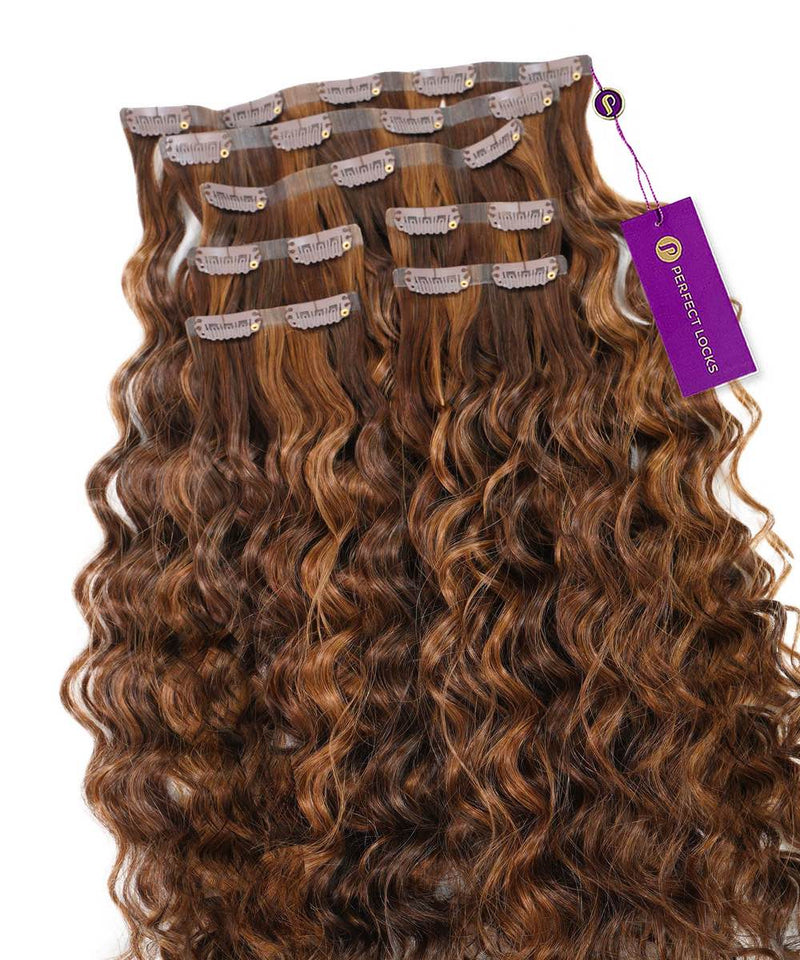
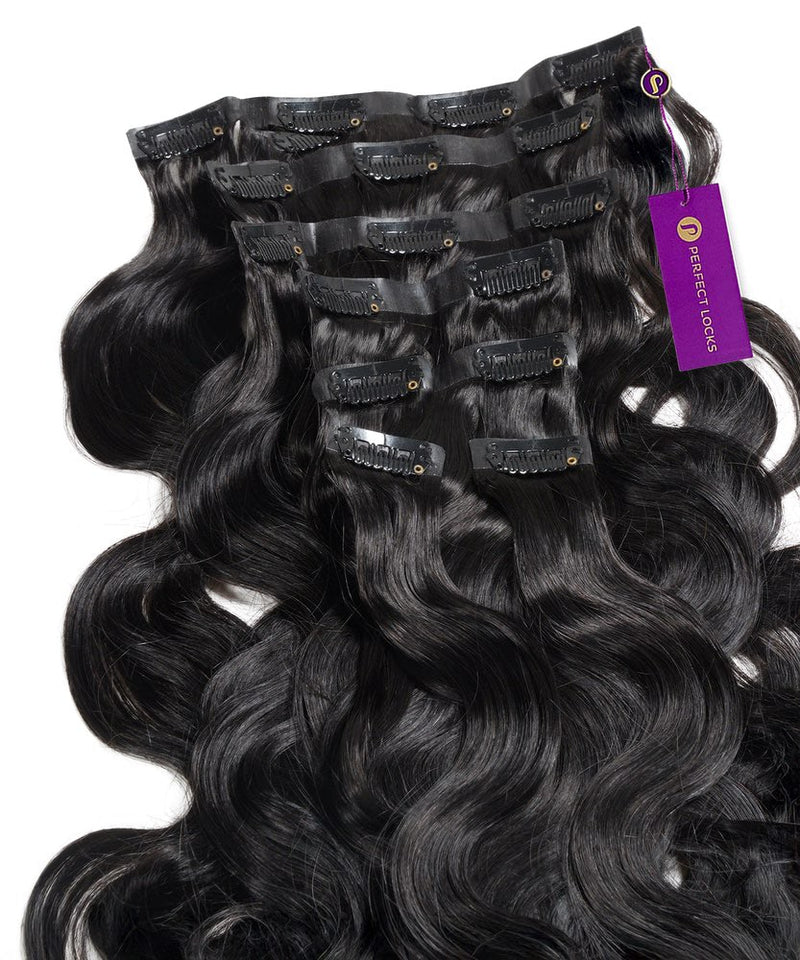
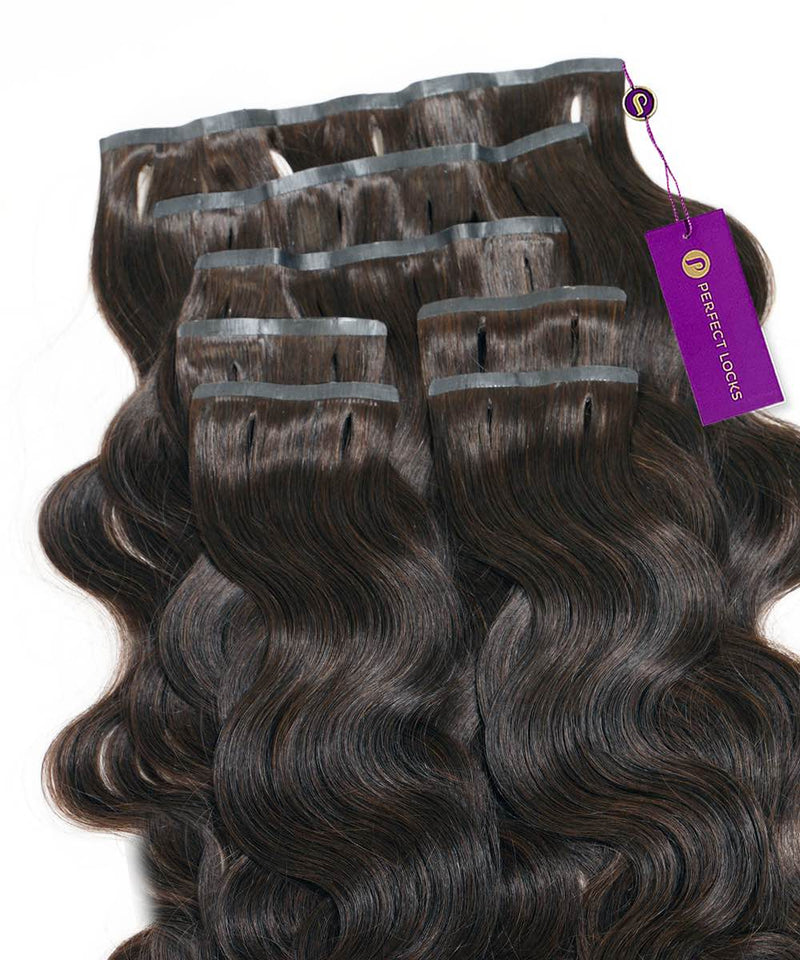
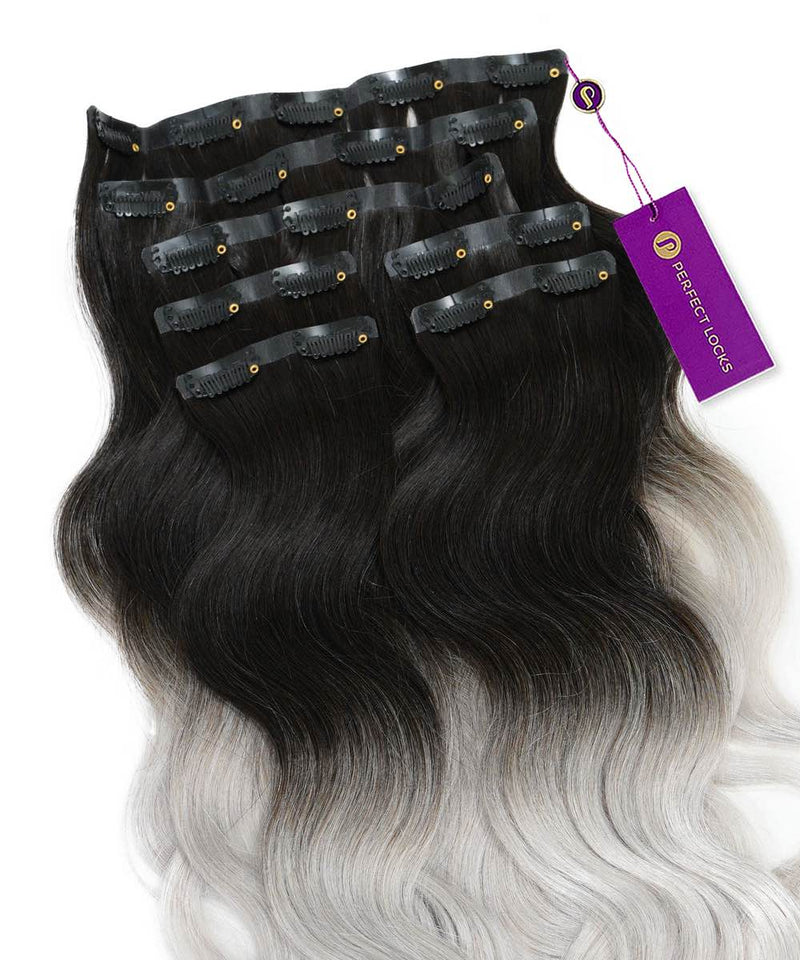
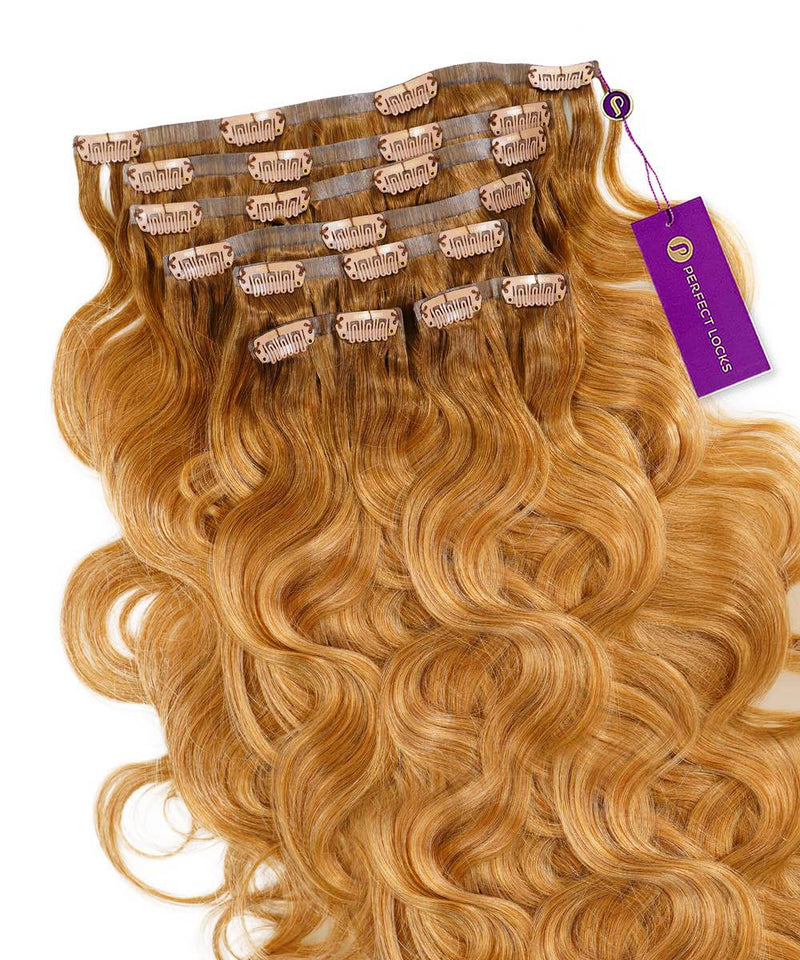
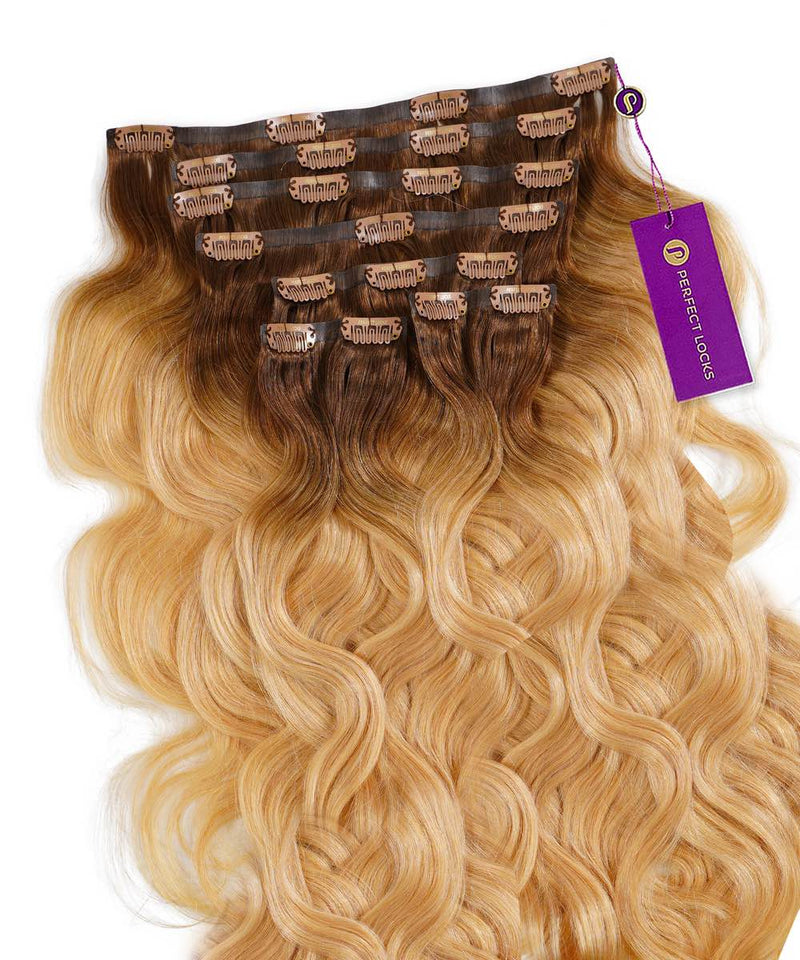
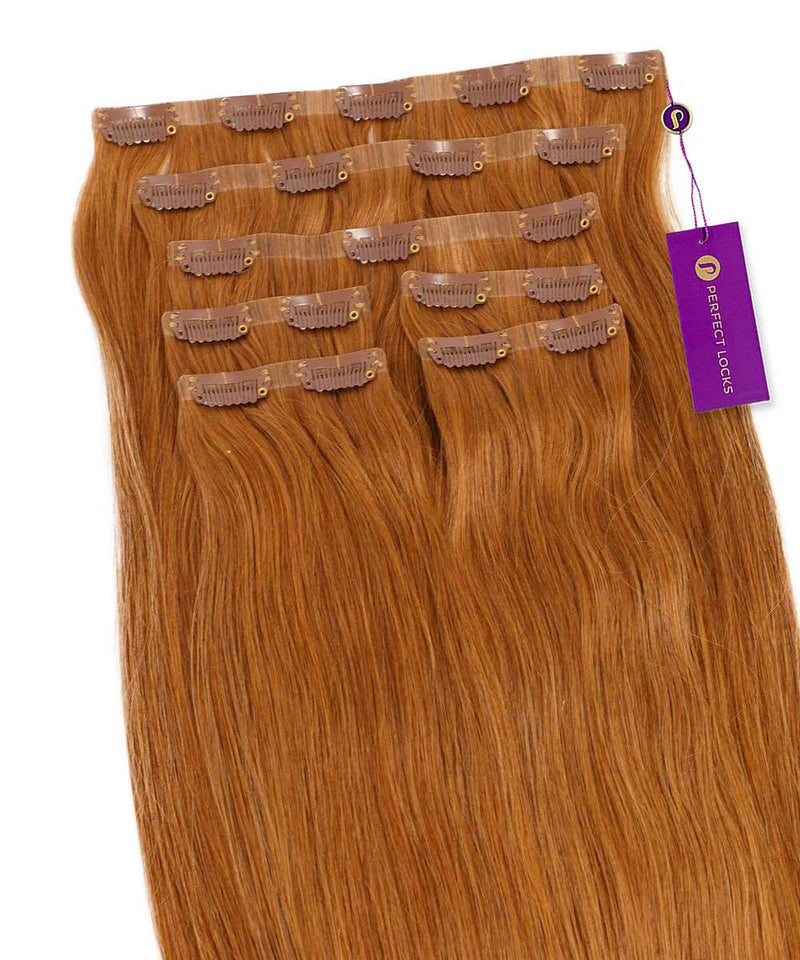
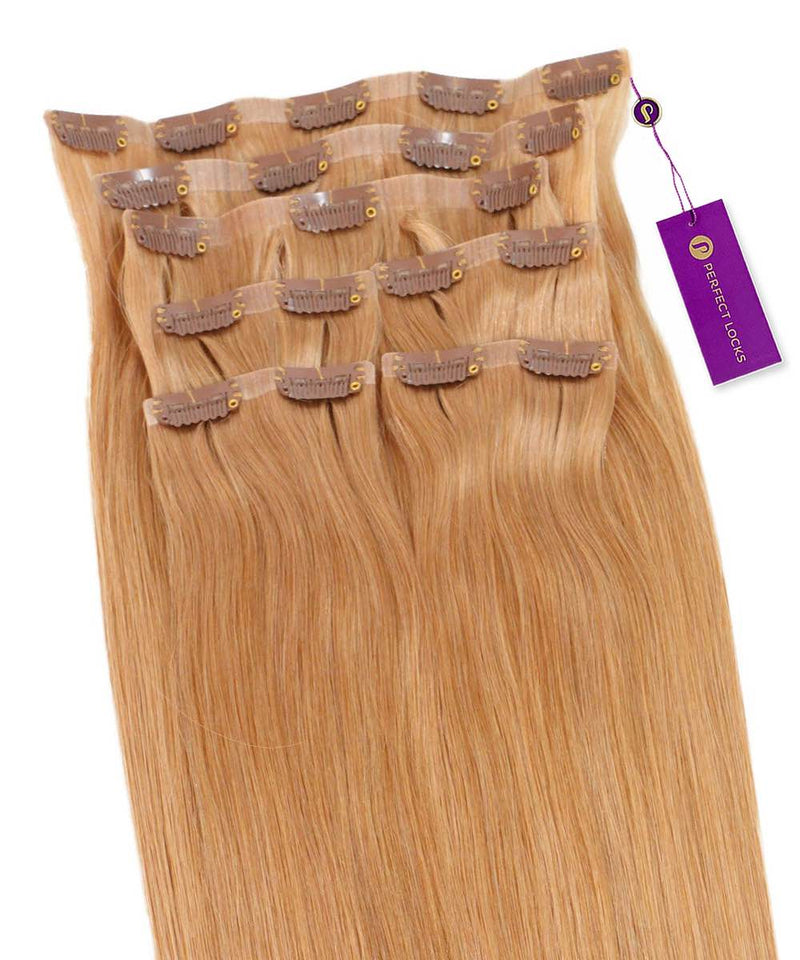
A typical clip-in set includes multiple wefts of different widths:
- 1-2 wide wefts (7-8") - For the back of your head
- 2-3 medium wefts (4-6") - For the sides and mid-back
- 2-4 small wefts (1-3") - For the sides and filling gaps
Don't feel like you need to use every piece. Many people skip the smallest wefts for everyday wear and only use the full set for special occasions.
How to Apply Clip-In Extensions
Here's the basic technique. It gets easier every time you do it.
Section your hair
Start at the nape of your neck. Use a tail comb to create a horizontal part about 1 inch up from your hairline. Clip the rest of your hair up and out of the way.
Tease the roots lightly
Gently backcomb the hair at your roots where you'll attach the weft. This creates grip so the clips don't slide. Skip this step if you have very thick hair.
Attach the weft
Open all the clips on the weft. Position the middle clip first, pressing it into your hair close to the scalp. Then secure the outer clips. You should hear a click when each clip closes.
Release and repeat
Let down another 1-inch section of hair to cover the weft you just placed. Repeat the process, working your way up your head. Use wider wefts at the back and narrower wefts at the sides.
Blend and style
Once all wefts are in, brush through your hair gently to blend your natural hair with the extensions. Style as desired - curl, straighten, or leave natural.
Pro tip: Leave the top 2-3 inches of your hair free (no extensions). This layer covers everything and creates the most natural look. Extensions should never be visible at your part or hairline.
Common Beginner Mistakes to Avoid
This Easy Extension Method Will Be Your First Love
We've seen every extension mistake in the book. Here are the ones beginners make most often:
Common placement and blending mistakes
- Placing extensions too high - if you clip near your part or temples, they'll show. Always leave at least 2-3 inches of hair on top. When in doubt, go lower.
- Using too many wefts - if your hair looks bulky, helmet-like, or feels heavy, you're using too much. Start with fewer pieces and add only what you need.
- Skipping the blend - if you can see where your hair ends and extensions begin, use a curling iron or straightener to style everything together. This hides the transition.
- Wrong texture match - straight extensions on wavy hair (or vice versa) will never look natural. Match your texture, or style both your hair and extensions the same way.
Mistake #5: Sleeping or swimming with clip-ins
Clip-ins are meant to be removed daily. Sleeping in them tangles the hair and damages the clips. Swimming with them exposes the hair to chlorine or salt water, which dries it out. Always remove them first.
Mistake #6: Ignoring your natural hair health
Extensions enhance your hair - they can't fix damage. If your natural hair is breaking or unhealthy, address that first. Extensions on damaged hair can make things worse.
Caring for Your New Extensions
Human hair extensions need care just like your natural hair - maybe even more, since they don't get oils from your scalp. Here's the basics:
Daily care
- Brush before and after wearing - Use a loop brush, starting from the ends and working up
- Store properly - Lay flat, hang on a hanger, or keep in a satin bag. Never crumple them in a drawer
- Remove before sleeping - Always. No exceptions for clip-ins
Washing (every 15-20 wears)
- Brush out all tangles first
- Use lukewarm water and sulfate-free shampoo
- Wash gently in a downward motion - don't scrub or bunch up the hair
- Apply conditioner from mid-length to ends (avoid the wefts)
- Rinse thoroughly and gently squeeze out water
- Lay flat on a towel to air dry - never wring or twist
Styling
- Heat styling is fine - Human hair can handle curling irons and straighteners
- Always use heat protectant - Extensions can't repair themselves like growing hair
- Keep temperatures reasonable - Under 350°F for regular styling
- Avoid heat near the clips/bonds - Focus on the hair itself
For detailed care instructions, see our complete extension care guide.
When to Upgrade or Try Something New
Clip-ins are fantastic for most people, but there are reasons you might eventually want to explore other options:
Consider tape-ins if:
- You want to wake up with your extensions already in
- You're tired of daily application
- You want to swim or work out without removing them
- You don't mind salon visits every 6-8 weeks
Consider sew-ins if:
- You have thick or textured hair
- You want a protective style
- You want extensions that can handle any activity
Have curly or coily hair? Browse our curly hair extensions for textures that blend with your natural pattern.
Not sure what's next? Read our complete guide to extension types for a full comparison.
Your Questions Answered
Will people be able to tell I'm wearing extensions?
Not if they're applied correctly and color-matched well. The key is proper placement (not too high), good blending, and matching your texture. Most people are surprised to learn that many women they know wear extensions - that's how undetectable they can be.
Will extensions damage my natural hair?
Clip-ins and halo extensions cause no damage when used correctly because they're removed daily. You're not putting constant tension on your hair. The only risk is if you sleep in them (which you shouldn't) or pull on the clips roughly when removing them.
How long do clip-in extensions last?
With proper care, quality human hair clip-ins last 1-2 years. Some of our customers have had the same set for 3+ years. The lifespan depends on how often you wear them, how you style them, and how well you care for them.
Can I color or dye my extensions?
Yes, human hair extensions can be colored. However, we recommend having a professional do it, especially if you're new to extensions. Coloring is easier than bleaching - you can go darker easily, but going lighter requires bleach and can damage the hair.
How many pieces do I need for a natural look?
For most people, 5-7 pieces create a full, natural look. You don't always need to use the entire set. Start with fewer pieces and add more only if needed. Using too many wefts is a common beginner mistake that makes extensions look obvious.
What if my extensions don't match perfectly?
Small color differences often disappear once you style your hair and extensions together. If the mismatch is significant, reach out to us - we have a 30-day return policy and can help you find a better match. Some people also have their stylist tone the extensions to match exactly.
Can I wear extensions with thin or fine hair?
Absolutely. In fact, adding volume is one of the main reasons people with fine hair love extensions. The key is choosing lightweight options - our seamless clip-ins and halo extensions are specifically designed for finer hair. Read our extensions for thin hair guide for detailed tips.
How do I know what weight/grams I need?
For fine hair, start with 100-120 grams. For medium density, 120-160 grams works well. For thick hair or maximum volume, 160-220 grams. When in doubt, start lighter - you can always get more, but heavy extensions on fine hair look unnatural.
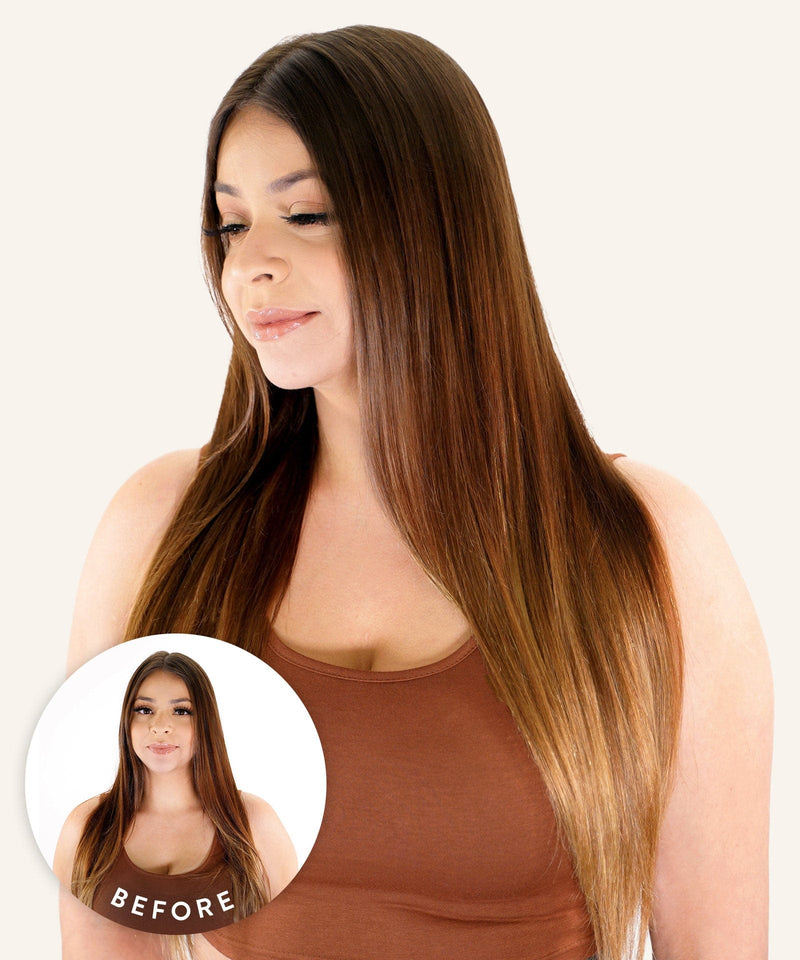
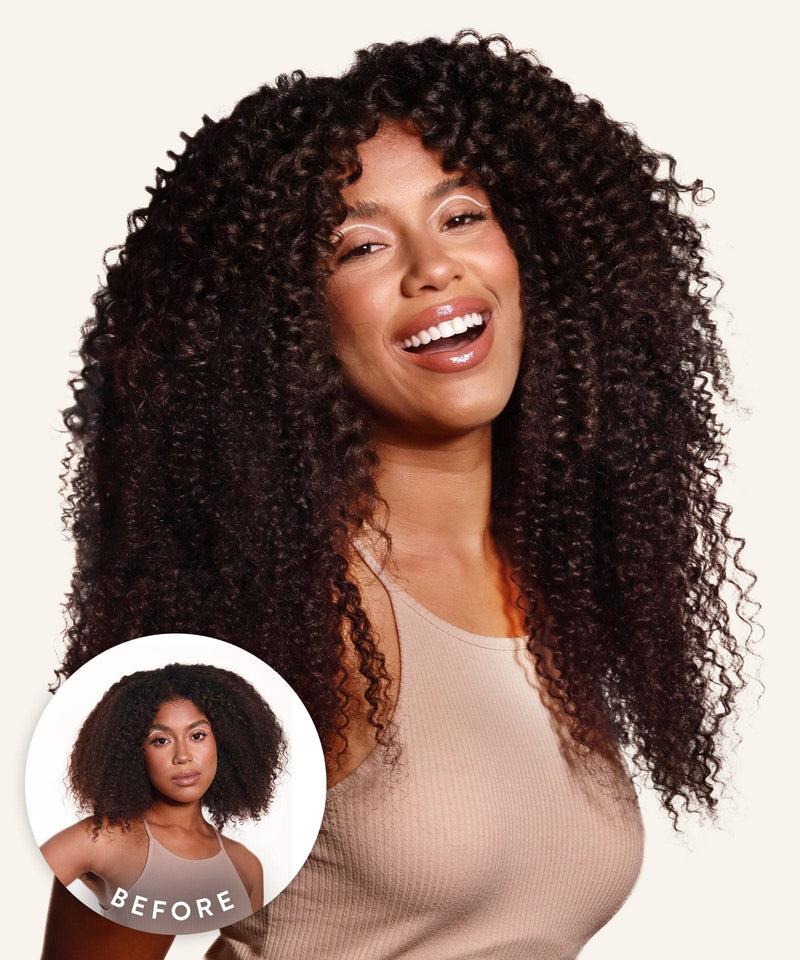
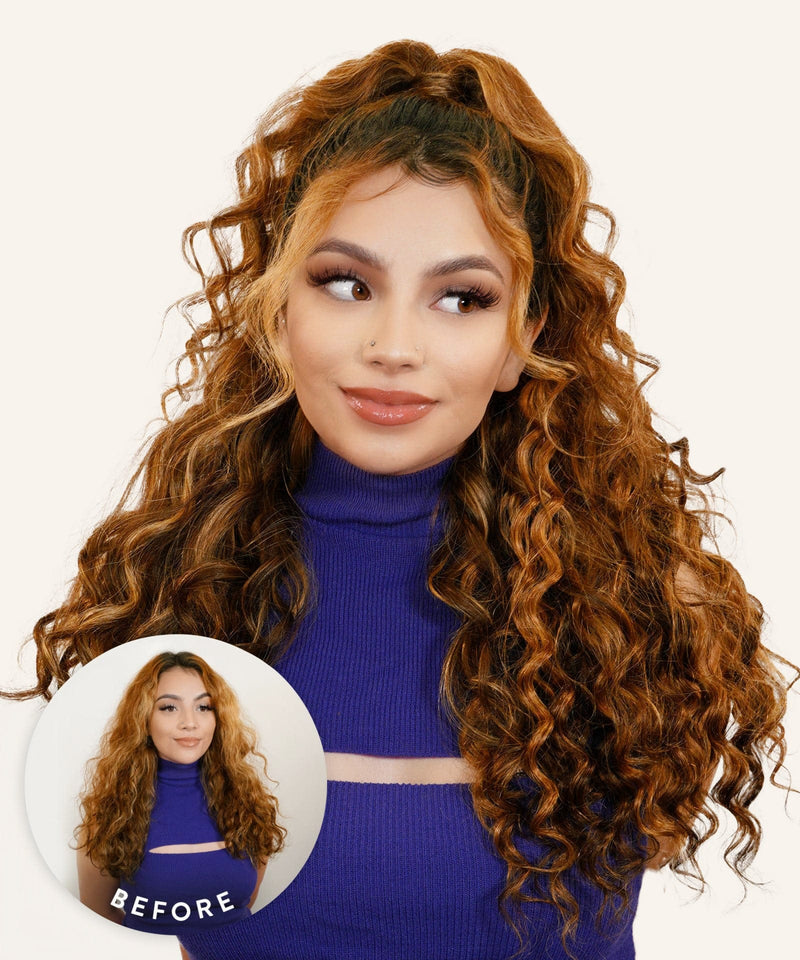
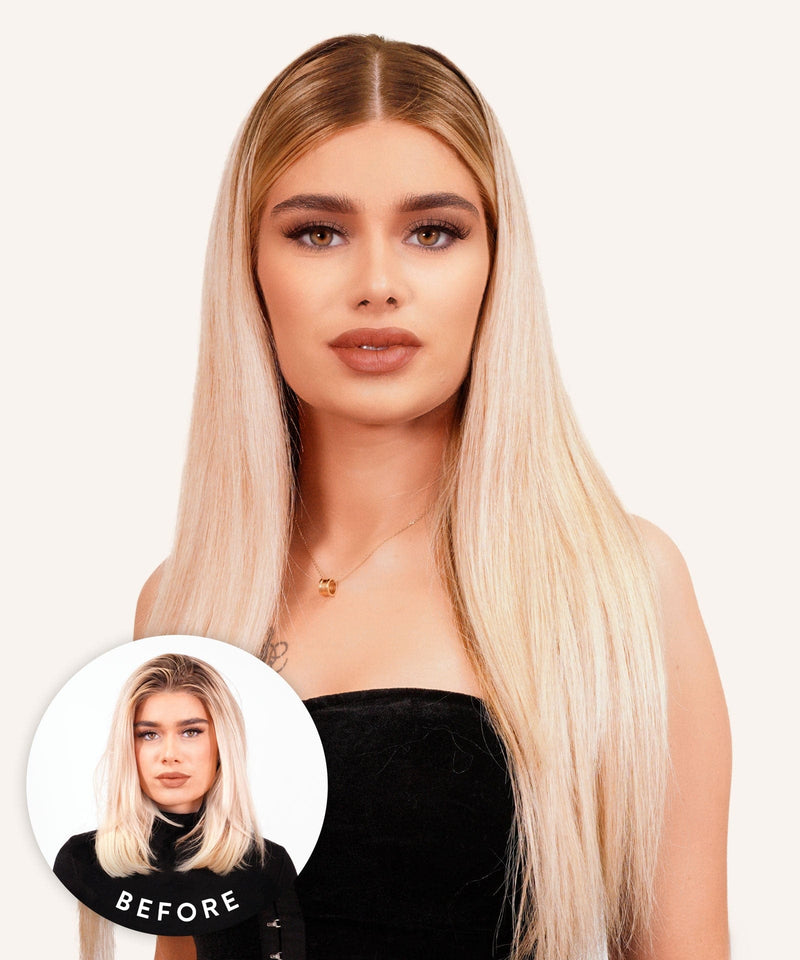
See Real Beginner Transformations
Still nervous? See what other first-time extension wearers have achieved:
Start Your Extension Journey
Getting your first hair extensions should be exciting, not stressful. Start with clip-ins, take your time with color matching, and don't overthink it. The beauty of temporary extensions is that you can experiment, learn what works for you, and adjust as you go.
At Perfect Locks, we're here to help at every step. Every set we sell is made from 100% ethically sourced Remy human hair, and our team personally handles color matching requests. We want you to love your extensions - that's why we offer a 30-day return policy and free consultations.
Ready to get started?
- Take our quiz: Find Your Perfect Match - Get personalized recommendations in 60 seconds
- Shop beginner-friendly options: Clip-In Extensions or Halo Extensions
- Get help: Free color matching and consultation
Have questions we didn't answer? Reach out anytime - we love helping first-timers find their perfect extensions.