Tape in hair extensions have become a popular choice for many people looking to add volume and length to their hair. They are easy to apply and maintain, and can last for several months with proper care.
However, when it comes time to remove them, it can be a bit trickier. If you're wondering how to remove tape in hair extensions at home, you're in the right place. This guide will walk you through the process step by step, so you can remove your extensions without damaging your natural hair or causing any discomfort.
It's important to note that while removing tape in extensions at home is possible, it is always recommended to seek the help of a professional stylist. However, if you're in a rush or can't make it to the salon, following the steps outlined in this guide will help you remove your extensions safely and efficiently. Proper tape in removal techniques are essential to avoid damage, so be sure to follow each step carefully.
During tape in removal, one common mistake is using the wrong products, such as a lower concentration of alcohol, or pulling too hard on the extensions. These mistakes can lead to damage or improper removal, so always use the correct tools and be gentle throughout the process.
Getting To Know Your Tape-In Hair Extensions
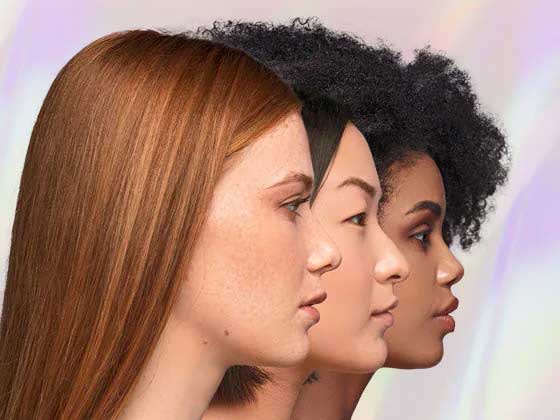
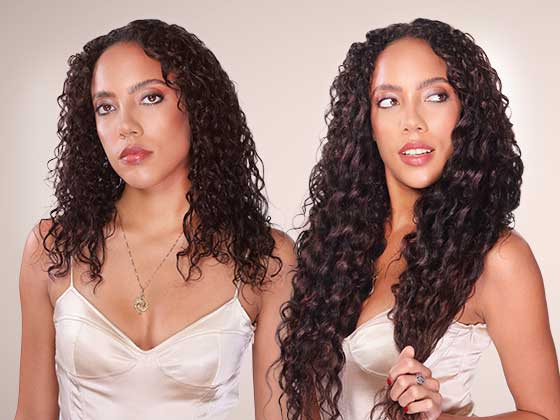
Tape-in hair extensions are a popular choice for those looking to add length and volume to their natural hair. These extensions are made from human hair and are applied using a specialized tape that attaches the extensions to the natural hair. The process is done by a professional hairstylist and typically takes about 20-30 minutes for volume application and 45-60 minutes for a full length application. The extensions are applied close to the root of the natural hair, making them appear seamless and natural.
Tape-In Hair Extensions: The Ultimate Guide
They are a great option for those who want a long-term solution for adding hair volume and length, as they can last up to a year with proper care and maintenance. One of the main advantages of tape-in extensions is that they are comfortable to wear, non-damaging, and versatile.
However, it is important to note that removing tape-in extensions can be a delicate process and should be done by a professional or with the proper tools and instructions.
Removing tape-in hair extensions is a crucial process that requires proper care and attention. Improper removal can cause damage to both your natural hair and the extensions themselves. This can result in shedding, breakage, and other problems. It is important to take the necessary precautions to ensure that the removal process is done correctly and safely. Some shedding or residue after tape-in extension removal is normal, so don't be alarmed if you notice this during the process.
One of the main reasons why proper removal is important is because it helps to prevent damage to your natural hair. Tape-in extensions are attached close to the root of your natural hair, which means that if they are not removed correctly, they can pull on and damage your natural hair. This can lead to hair loss and other problems.
Another reason why proper removal is important is because it helps to prolong the life of the extensions. If extensions are removed incorrectly, they can become tangled and matted, which can make them difficult to reuse. Proper removal helps to keep the extensions in good condition, so they can be used again in the future.
Lastly, proper removal is important because it helps to ensure that the extensions are removed without any pain or discomfort. If extensions are removed incorrectly, it can be a painful and uncomfortable experience. By taking the necessary precautions and following the proper removal steps, you can ensure that the process is as painless and comfortable as possible.
Preparing for Removal
Gather Necessary Materials
Before starting the removal process, it's essential to gather all the necessary materials that you'll need. The most important item is an adhesive remover that's specifically made for tape-in extensions. These removers are formulated to dissolve the glue that holds the extensions in place without causing damage to your natural hair. Some people use alcohol or an alcohol-based remover as an alternative, which are often available in a convenient spray form for easy and even application. If you choose to use alcohol, make sure to use the correct concentration to avoid damaging your hair.
Other materials that you may need include natural oils such as coconut oil, olive oil, baby oil, or almond oil. These oils can be used as an alternative to adhesive remover and can help to break down the glue and make the removal process easier. However, it's important to avoid using oils with chemical bases as they may cause damage to your natural hair. If you don't have access to natural oils, you can also use peanut butter as an alternative.
In addition to the above materials, you may also need a hair clip to keep your hair out of the way during the removal process, as well as a comb to gently comb out any tangles in your hair extensions.
Clean and Dry Hair
Before beginning the removal process, it is important to ensure that your hair is clean and dry. This will help to minimize any potential damage to your natural hair and make the removal process easier. Start by washing your hair with a clarifying shampoo to remove any product buildup and dirt.
Then, let your hair air dry or gently towel dry it before proceeding with the removal. It is important to note that removing tape-in extensions from dirty or wet hair can make the process more difficult and may cause damage to both your natural hair and the extensions.
Separate Hair Into Sections
Before removing the tape-in extensions, it is important to separate your hair into manageable sections. This will make it easier to locate the extensions and remove them without tangling or damaging your natural hair. Use a hair clip or tie to separate your hair into sections, making sure to keep the extensions visible for easy removal. This step is crucial for the proper removal process, as it allows for a controlled and efficient process.
Preventing Breakage
Preventing breakage is one of the most important steps in the removal process of tape in hair extensions. To protect your natural hair and keep your extensions in good condition, always start by applying a small amount of natural oil, such as olive oil or coconut oil, directly onto the tape area. This helps to loosen the adhesive, making it easier to gently peel the tape ins away from your hair. Use a hair clip to section your hair, and a rat tail comb to carefully separate each tape in extension. When you remove the tape, gently peel it off in the same way it was installed, slowly working from the roots down to the ends. Avoid using heat or pulling on your hair, as this can cause unnecessary breakage and damage. By taking your time and using the right tools and techniques, you can ensure a smooth removal process that keeps your natural hair healthy and strong.
@perfectlocks So easy to remove! Pain free and gentle on your hair! #hairtok #tapeins #hairremoval #tapeinextensions #hairextensions ♬ original sound - ArchiveAmhara
Removing the Extensions
Removing tape-in hair extensions at home can be a bit tricky, but with the right steps and materials, it can be done safely and effectively.
Use of Adhesive Remover
When using adhesive remover, it is important to carefully follow the instructions on the product. Generally, the process involves saturating the tape with the remover and waiting for a certain amount of time (usually around 10-15 minutes) for the adhesive to break down.
Once the tape has been loosened, gently peel it away from the natural hair, being careful not to pull or tug on the extensions. If the adhesive is still firmly in place, you may need to reapply the remover and wait longer before attempting to remove the extensions again. It is important to work in small sections and take your time to ensure a safe and damage-free removal process.
Use of Natural Oils
When using natural oils, such as coconut oil, olive oil, baby oil, almond oil, etc. to remove tape-in extensions, it's important to apply the oil directly to the tape and allow it to sit for at least 10-15 minutes. Make sure to create a thin, even layer of oil over the tape tabs, as this layer helps to loosen the adhesive and makes removal easier. This will help to break down the adhesive and make it easier to remove the extensions. It's important to work in small sections and to be gentle when peeling the extensions off to avoid any damage to your natural hair.
After removing the extensions, be sure to thoroughly wash your hair to remove any excess oil and condition it well to restore any moisture that may have been lost during the removal process.
Use of Peanut Butter
Another alternative to adhesive remover and natural oils is the use of peanut butter. Peanut butter is a great option if you don't have access to other products. Simply apply a small amount of peanut butter to the tape of the extensions, making sure it is covered evenly. Leave it on for 30 minutes to allow the natural oils in the peanut butter to penetrate the adhesive.
Then, gently comb through the extensions to remove them. Keep in mind that this method may leave a peanut butter scent in your hair, so make sure to wash your hair thoroughly after the removal process.
Gently Peeling Off Extensions
Once the extensions have been loosened, it's time to gently peel them off. Start at the roots and slowly work your way down, being careful not to pull or tug on the natural hair. To avoid damage, gently un-stick the tape from your hair by carefully separating the adhesive from the strands instead of pulling. Use a comb or your fingers to help loosen the extensions and separate them from your natural hair.
A helpful trick if the tape is stubborn is to use a rat tail comb or apply a bit more oil to help with the peeling process.
It's important to take your time and not rush the process to avoid any damage to your natural hair. If the extensions are not coming off easily, apply more adhesive remover or natural oil and wait a few minutes before trying again. Remember to be gentle and patient throughout the process.
Additional Tips for Difficult-to-Remove Extensions
If you are having trouble removing your tape-in extensions despite following the steps outlined above, there are a few additional tips that may help. Remember, minimizing stress on both your hair and yourself is important - use gentle techniques and take breaks if needed to avoid unnecessary strain.
Use a fine-toothed comb to gently comb through the extensions before attempting to remove them. This can help loosen any tangled or matted hair, making it easier to remove the extensions.
If the extensions are still not coming out easily, try using a hair dryer on a low heat setting to gently warm up the adhesive. This can help soften the adhesive and make it easier to remove the extensions.
If the extensions are still not budging, it may be best to seek professional help. A hairstylist or extension specialist can safely and effectively remove the extensions without causing damage to your natural hair.
It is important to remember that proper removal of tape-in extensions is crucial to maintaining the health and integrity of your natural hair. Be patient and take your time, using the methods and tips outlined above to safely and effectively remove your extensions at home.
Extensions Without Damage
If you want to remove your tape in extensions without causing damage, patience and gentle handling are key. Start by applying a small amount of oil-based remover, such as baby oil or another natural oil, to the tape area. Allow the oil to sit for a few minutes so the adhesive can loosen. Then, use a comb or your fingers to gently peel the tape off, working slowly and carefully to avoid causing breakage. After all the extensions are removed, use a clarifying shampoo to wash away any leftover residue from the adhesive or oil. Follow up with a good conditioner to restore moisture to your hair. This combination of oil-based remover, gentle peeling, and thorough cleansing will help you remove your tape in extensions without damage, leaving your hair soft and healthy.
Avoiding Breakage
One of the most common mistakes during the removal process of tape in hair extensions is causing breakage by using the wrong methods. To avoid this, never use excessive heat or pull on your hair when trying to remove the tape. If you need to soften the adhesive, use a hair dryer on a low heat setting, but always keep it gentle. Apply a small amount of glue remover or oil-based remover to the tape area to help loosen the adhesive. Then, use a comb or your fingers to gently peel the tape away from your hair, taking care not to rush or force the process. Being careful and patient will help you remove your tape in extensions without causing breakage or damage, ensuring your natural hair stays healthy and strong.
Professional Removal
For the safest and most effective removal process, consider having your tape in hair extensions removed by a professional stylist. Professionals have the right tools and expertise to remove the extensions without causing breakage or damage to your natural hair. They typically use a combination of oil-based remover and gentle peeling techniques to remove the tape, followed by a clarifying shampoo to eliminate any leftover residue. A professional can also offer valuable advice on caring for your hair and extensions, and can expertly install new extensions if you wish. Choosing professional removal ensures your hair stays healthy and your extensions remain in great condition for future use.
After Care
Washing and Conditioning Extensions
Once the extensions have been removed, it's important to give them a proper wash and condition to ensure they are clean and free of any residue or product buildup. Washing your hair in the shower after removal helps to thoroughly cleanse away any residue. This is also a good time to give them a good detangle to prevent any tangling. To wash, use a gentle shampoo and conditioner specifically designed for extensions. After washing, let the extensions air dry overnight before reapplying them.
Air-Drying Extensions
After washing and conditioning your tape-in extensions, it is important to air-dry them properly. Avoid using a hair dryer or any heat styling tools as this can cause damage to the extensions. Simply lay them flat on a towel or hang them up to dry. Allowing them to air-dry overnight will ensure that they are completely dry and ready for reuse or storage. Make sure to store them in a safe place and away from any heat sources to keep them in good condition for future use.
Applying New Tape (If Desired)
If you wish to reapply your tape-in extensions, it is important to wait until your natural hair and extensions are clean and dry before reapplying. Once your extensions are dry, you can lay them out flat and apply new tape along the top of the extensions. Make sure the tape is stretched out and attach it in a straight line. Cut the tape to the appropriate size before attaching it to the extensions. We recommend getting help from a professional or someone experienced in applying tape-in extensions to ensure the best results. It is also important to wait 2 days before washing your hair again after applying new tape to ensure the tape sticks properly.
@perfectlocks Save this for retaping your Seamless Wefts! 💜 #hairtok #tapeins #hairhack #hairtips ♬ PASSO BEM SOLTO - Slowed - ATLXS
Conclusion
Removing tape-in hair extensions at home can be a simple and easy process as long as the right steps and materials are used. They can be a great way to save money and time, but it is important to remember that seeking professional help is always an option if you are having trouble with the process. It is important to remember that tape in extensions, like all hair extensions, need to be handled with care.
If you are having trouble removing your extensions or if you are experiencing any pain or discomfort, it is best to seek the help of a professional stylist. They will be able to safely and effectively remove your extensions without causing any damage to your natural hair. Additionally, they will be able to provide you with guidance and tips for maintaining your extensions so that they last as long as possible.
So, if you are unsure about how to remove your tape in extensions or if you are experiencing any problems, do not hesitate to seek professional help.
With the right care and attention, tape-in hair extensions can be a great way to add volume and length to your hair, while keeping your natural hair safe and healthy.
Thanks for reading, guys! Good luck with your tape in extension removal.