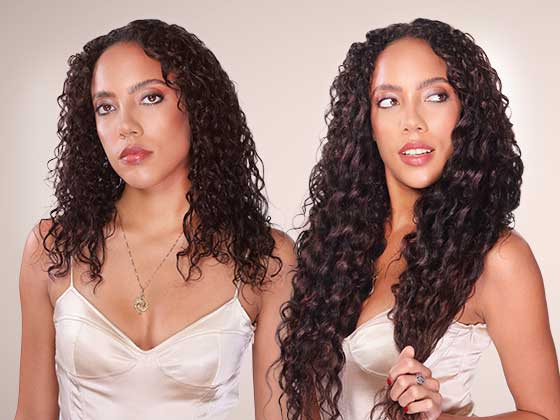
There you are, sitting in the chair at your favorite hair salon. Your hairdresser finishes up, you take a look at your hair is perfect. Not just perfect, flawless. Your extensions look amazing, your hair is shiny, full, voluminous and when you hit the sidewalk looking like a celebrity on her way to an opening.
Then the next day happens…
There’s a reason that blowout bars sprouted nationwide the last decade and it starts with one simple fact: growing up none of us were taught the right way to do a blowout. Chances are you learned from Mom, sister or grandmother, but they in turn learned the same way.
Your hairdresser on the other hand had the benefit of beauty school to teach how to do it the right way. But fret not, you don't need to attend a beauty school just for you to achieve your desired look.
Here’s how to do a blowout at home just like you enjoy at the salon!

Tools and Products You Might Need:
- Blow dryer with nozzle
- Round brush (usually a medium to large size, depending on your hair length)
- Heat protectant spray
- Hair clips or hair ties
- Blow out cream (optional)
- Styling products like mousse, hair serum, or volumizing spray (optional)
- Hairpins or bobby pins (optional)
Tip # 1
If you want volume, you need to ditch the sulfates.
If you check the back of your shampoo bottle, make sure that it doesn’t contain any chemical ingredient that ends with -sulfate. The reason this is so important where a great blowout is concerned is that sulfates are a harsh chemical detergent that strips the hair completely, including moisture.
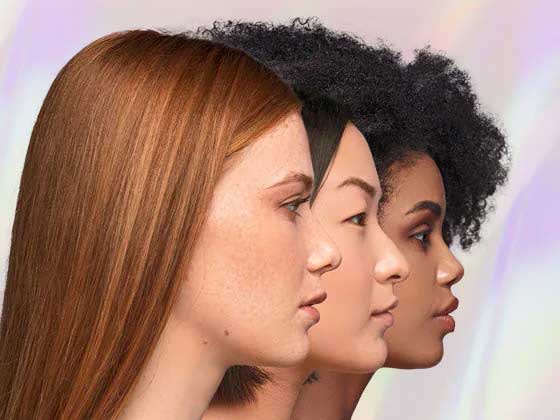
This means that your hair and even your hair extensions will be limp, flat and dull, lacking volume. We’ve got you covered with our Perfect Locks Homecare Products! When it comes to shampooing your hair, if you have thicker, coarser curls, try not to wash them every day.
Tip # 2
Use the RIGHT styling tools!
The blow dryer you use really matters and it’s the reason that your hairdresser uses a really good one. While prices can vary, you want to pick a high wattage blow dryer, starting with at least 1800 watts to prevent your hair from frizzing up. If you have thicker hair, you want to go as high as 2000 watts to ensure a great blowout.

Tip # 3a
For a sleeker blowout, start with wet hair.
If you’re going for volume, start with wet hair and blow dry your hair upside down with the dryer at a 45 degree angle to redirect the roots of your hair with heat for some extra volume. After your hair is about 60% dry, flip your hair upright and continue to blow-dry your hair while picking up the roots.
Tip # 3a
For a bigger, bouncier blowouts, start with a damp hair.
Put the nozzle on your dryer and, beginning with the nape section, wrap a 2-to-4 inch section of hair around the brush and pull as taut as you can. Keeping the hair taut is 50 percent of the battle, the other 50 percent is the direction of the airflow. Ensure that your dryer nozzle is pointing down the hair shaft from roots to ends. When each section is completely dry, use the cool shot to finish it.
Steps To Follow For A Perfect Hair Blowout At Home
Step 1: Start with Clean Hair
Begin with freshly washed and conditioned hair. Depending on the type of look you want to achieve, you can towel-dry your hair gently to remove excess moisture.
If you have curly hair, you can start when your hair is still wet. If your hair is wavy, you can dry it from 50 to 80% so it doesn't take you so much time to blowout your hair.
Step 2: Section Your Hair
To make the blowout process more manageable, divide your hair into sections. Use hair clips or ties to secure each section out of the way. Start with the bottom layers and work your way up. A good rule of thumb is to create three to four sections, depending on the thickness of your hair.
Step 3: Choose Your Direction
Decide which direction you want your hair to flow. For a classic blowout, you can either blow-dry your hair straight down for a sleek look or roll it under for a bouncy finish. If you want extra volume, blow-dry your hair in the opposite direction of its natural growth.
Step 4: Begin Blow-Drying
Attach the concentrator nozzle to your hair dryer for more precise airflow. Start with the first section at the bottom. Hold the hair dryer a few inches away from your scalp and point it in the direction you want your hair to go.
Use your round brush to guide your hair while applying tension. Roll the brush inwards (under) for a curved, bouncy finish or straight down for a sleek look.
Step 5: Work in Sections
Continue blow-drying each section, making sure to dry it completely before moving on to the next. Be patient and take your time. Use your round brush to smooth out any kinks or waves, and keep the hair dryer moving to avoid overheating any one area.
Step 6: Add Volume
If you want more volume, focus on the roots. Lift the hair at the roots with the round brush while directing the airflow towards them. You can also use styling products like mousse or volumizing spray at the roots for added lift.
Step 7: Cool Down
Once you've finished blow-drying each section, switch your hair dryer to the cool setting and blast your hair with cool air for a few seconds. This helps set the style and adds shine.
Step 8: Finishing Touches
If you want extra hold and shine, you can apply a light mist of hairspray. For a polished look, you can use a small amount of hair serum or oil to smooth out any frizz and add shine. If necessary, use hairpins or bobby pins to secure any loose sections.
Step 9: Final Look
Take a moment to admire your perfect blowout! Your hair should look smooth, shiny, and bouncy.
Boom! Done. Remember that practice makes perfect when it comes to achieving a salon-quality blowout at home. It may take a few attempts to get the hang of it, but with time and patience, you can master the technique and enjoy the benefits of a beautiful blowout whenever you like.

Author and Founder of Perfect Locks LLC
Priyanka Swamy, the visionary founder of Perfect Locks LLC, is a passionate advocate for empowering women and promoting cultural diversity. With an unwavering commitment to ethical sourcing and quality craftsmanship, she redefined the hair extension market and created a supportive community that celebrates individuality.
Priyanka's dedication to sustainability and social responsibility continues to inspire positive change within the industry. Her journey with Perfect Locks remains an inspiration, unlocking the true potential and confidence of countless individuals worldwide.