


The Short-to-Stunning Change

Clip ins on short 4c hair can create an instant change when installed correctly. Here's what you need to know:
- Minimum hair length: 2-3 inches is ideal for secure attachment
- Sets needed: 2 sets recommended for full-head volume
- Installation time: 10-15 minutes without professional help
- Key technique: Backcomb roots or add texture spray for better grip on short hair
Installing clip-ins on short 4C hair doesn't have to be complicated. The tight coil pattern actually provides excellent grip when prepared properly, and with the right techniques, you can achieve stunning volume and length in minutes.
Many women with TWAs (Teeny Weeny Afros) or freshly growing 4C hair believe they can't wear extensions until their hair reaches shoulder length. This simply isn't true! With proper preparation and the right clip-in extensions, even hair as short as 2-3 inches can be transformed.
"Nearly impossible to distinguish where my hair ended and the extensions began." — Real customer review from Perfect Locks Extenisons
The secret lies in creating proper anchor points for the clips and selecting extensions that perfectly match your natural texture. When done correctly, clip-ins offer a low-manipulation protective style option that can actually promote growth while giving you versatility.
I'm Priyanka Swamy, founder and CEO of Perfect Locks, and I've spent 15 years helping women with all hair textures, including developing specialized techniques for clip ins on short 4c hair that ensure secure, natural-looking results without damage.
 Prepare hair with light product, 2) Create horizontal partings starting at nape, 3) Backcomb each section at the roots, 4) Position clips close to scalp and snap shut, 5) Work upward in sections, leaving top layer out to cover tracks - clip ins on short 4c hair infographic")
Why Clip Ins on Short 4C Hair Work: Benefits & Limitations
When I talk with our clients who have short 4C hair, I often see that moment of surprise light up their faces when they learn clip-ins are actually an option for them. The truth? Clip ins on short 4c hair not only work—they can completely transform your look when done right. Let's explore why they might be your new best friend, along with a few challenges you should know about.

The Upside: Volume, Length & Versatility
Imagine going from your TWA to shoulder-length gorgeousness in just minutes. That's the magic of clip-ins! They offer low-maintenance styling that doesn't require a professional's help or hours of your time—just 10-15 minutes and you're done.
The instant length change is probably my favorite benefit. You can dramatically switch up your look for a special event, job interview, or just because it's Tuesday and you feel like it. No commitment necessary.
Many women don't realize that clip-ins can actually serve as a protective style when used correctly. By giving your natural hair a break from daily manipulation, you're creating space for growth while still enjoying versatility.
For those with thinner 4C hair, the volume boost alone is worth trying clip-ins. That fullness that might take years to grow naturally? You can have it today.
"I never thought I could wear extensions with my TWA, but these clip-ins gave me the confidence to rock my natural texture for everyday and switch to longer styles for client meetings," one of our customers shared recently. That confidence boost is something we hear about constantly—having options can be incredibly empowering.
Perhaps best of all, clip-ins let you experiment with length without applying heat to your natural hair, helping prevent damage during your growth journey.
The Downside: Slippage & Blend Issues
Let's keep it real—clip-ins aren't without their challenges, especially for short 4C hair:
The most common issue we hear about is clip security. Your beautiful coils might struggle to hold the weight of extensions if the clips aren't properly secured. (Don't worry—we'll show you exactly how to prevent this later.)
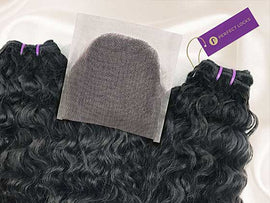
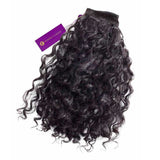
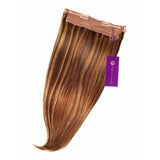
Finding extensions that perfectly match your unique texture can sometimes feel like a pain. The good news is that high-quality options exist (like our specially designed 4C texture clip-ins, Kinky Curly, at Perfect Locks).
Blending shorter lengths requires specific techniques that you'll need to master. The transition between your TWA and longer extensions should look seamless, not obvious.
Improper installation can lead to uncomfortable scalp tension, which nobody wants. Proper placement is key to keeping things comfortable all day.
There is a small learning curve involved, but I promise it's worth it. Most of our clients become installation experts after just 2-3 practice sessions.
The beautiful thing? Every single one of these challenges can be overcome with the right products, proper techniques, and a little bit of practice. Our clients consistently tell us that the benefits far outweigh the initial learning curve.
Pre-Installation Checklist: Is Your TWA Ready?
Before jumping into installation, let's make sure your short 4C hair is properly prepared for clip-ins. This preparation stage is crucial for both the security of your extensions and the health of your natural hair.

Let's be honest - not every TWA is immediately ready for clip-ins, but with the right preparation, most can work beautifully! The "2-3 inch rule" is your first consideration. While this length provides ideal grip for clips, don't worry if you're slightly shorter - we have workarounds for that too.
Your scalp health matters tremendously. Before installing any extensions, check for irritation, flaking, or tenderness. A healthy scalp is the foundation for both your natural hair and your clip-ins.
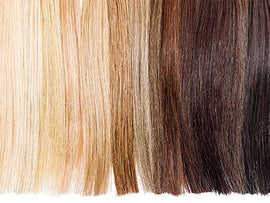
Finding the right texture match makes all the difference between "Is that your hair?" and "I can see your extensions." 4C hair has a unique coil pattern that needs carefully selected clip-ins to blend seamlessly.
The perfect color match might seem obvious, but even slight variations can be noticeable. Natural 4C hair often has subtle color variations throughout, so look for extensions that capture this dimension rather than a flat, single tone.
| Natural Hair Length | Clip-In Viability | Sets Recommended | Special Techniques Needed |
|---|---|---|---|
| Less than 1 inch | Challenging | 1-2 sets | Bobby pin reinforcement + wax stick |
| 1-2 inches | Possible | 1-2 sets | Heavy backcombing + gel |
| 2-3 inches | Good | 2 sets | Standard backcombing |
| 3+ inches | Excellent | 2 sets | Minimal prep needed |
When it comes to number of packs, more is better with short 4C hair. Two full sets typically create the most natural-looking volume and coverage. You can always use fewer pieces, but having extras gives you flexibility for different styles.
Don't compromise on quality standards - your TWA deserves the best! High-quality clip-ins not only look more natural but also last longer and cause less damage to your natural hair.
Choosing Clip Ins for Short 4C Hair
The magic is in the details when selecting clip-ins for your TWA. Density is your best friend here - look for clip-ins with substantial volume (around 113-130 grams per set) to create that full, natural look that blends with 4C hair's natural thickness.
Double-drawn wefts are worth every penny. These premium extensions maintain consistent thickness from root to tip, mimicking the natural fullness of healthy 4C hair. This detail makes a dramatic difference in how natural your final look appears.
The little things matter too - like silicone clips that grip short hair more effectively than standard metal ones. These specialized clips can be the difference between secure all-day wear and constant readjustment.
At Perfect Locks, we're passionate about ethical sourcing. Our 100% human hair extensions aren't just beautiful - they're responsibly sourced, giving you peace of mind along with your gorgeous new look.
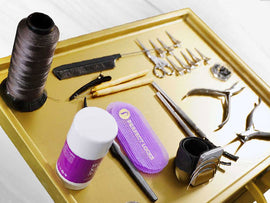
Tools & Products You'll Need
Success is all in the preparation! Before starting your clip ins on short 4c hair journey, gather your essential toolkit:
A good rat-tail comb will become your best friend for creating precise parts. Pair this with sturdy sectioning clips to keep everything organized as you work.
Your edge control, gel, or wax stick serves double duty - creating sleek edges and helping form better anchor points for your clips. A light leave-in conditioner provides moisture without causing slippage (a common problem with heavier products).
Keep a spray bottle handy for light dampening if needed, and don't forget a hand mirror for checking those tricky back sections. For extra-short hair, bobby pins can provide additional security beneath clips.
Small hair ties help keep sections manageable during installation, while texturizing spray or dry shampoo creates grip on particularly smooth or slippery hair.
With everything prepared and your tools at the ready, you're set for a successful installation! The time you spend preparing pays off with a more secure, comfortable, and natural-looking result.
Want to learn more about selecting the perfect clip-ins? Check out our comprehensive guide to clip-in hair extensions for even more detailed advice.
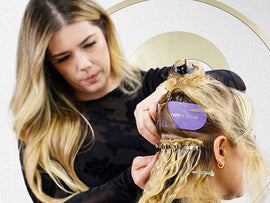
Step-by-Step Guide: Installing Clip Ins on Short 4C Hair
Ready to transform your TWA? Let's walk through exactly how to install clip ins on short 4c hair – trust me, with the right technique, those clips will stay secure all day long!

Sectioning and Anchoring Clip Ins on Short 4C Hair
The magic of a successful installation starts with creating the perfect foundation. Begin with freshly washed, dry or slightly damp hair. I always recommend applying a light leave-in conditioner – just enough to keep your natural hair happy without causing slippage.
For those with super short hair (under 2 inches), here's my secret weapon: apply a tiny amount of strong-hold gel to your roots where the clips will sit. This creates that extra grip that makes all the difference!
Grab your rat-tail comb and create a clean horizontal parting about an inch from your nape. This will be your first anchor point. Clip the rest of your hair up and out of the way – organization is your friend during this process!
Now for the crucial step that most people skip: backcombing. Take small sections of that exposed hair and gently tease the roots. This creates texture that gives those clips something to hold onto. Think of it as creating little "nests" for your clips to grip. For those with very short hair, I always add a touch of texturizing spray to these backcombed sections for extra security.
When you're ready to attach your first weft, select the smallest piece from your set (usually a 2-clip weft). Position it as close to the root as possible on your prepared section. Press down firmly and snap those clips closed – they should lie flat against your scalp. Give it a gentle tug to ensure it's secure before moving on.
Continue creating horizontal partings about an inch apart, working your way up the back of your head. Remember to backcomb each new section before attaching the next weft. As you move up, you'll use progressively larger wefts (3-clip or 4-clip pieces).
For the sides, create small horizontal sections and attach your smaller wefts. I love to angle these slightly to follow the natural hairline – it creates a much more flattering look!
Before you finish, use a hand mirror to check the back and sides. Make sure no tracks are visible and all clips feel secure. Run your fingers through to check for any loose areas that might need reinforcing.
Keeping Clip Ins on Short 4C Hair Secure All Day
The biggest concern I hear from clients with short 4C hair is, "Will these stay in all day?" With these expert techniques, the answer is absolutely yes!
Place your wefts in a U-shape pattern rather than straight across. This distributes the weight more evenly and prevents that dreaded middle-of-the-day slippage. For even more security, try positioning adjacent clips in a slight criss-cross pattern instead of all pointing in the same direction.
If your hair is on the shorter side (less than 2 inches), don't hesitate to place a bobby pin directly over each clip for that extra insurance policy. It might seem like overkill, but you'll thank me when your extensions stay perfectly in place during that important meeting or special event!
For my gym-loving clients, I always recommend a light mist of hairspray to the backcombed sections before attaching clips. This "gym-proof hack" has saved many a workout hairstyle!
After installation, do a quick security check: bend forward and gently shake your head. If anything feels loose, simply remove that weft and reattach it with a bit more backcombing. For all-day wear, a quick bathroom check midday to re-secure any loose clips can make all the difference.
Balance is key – avoid overloading any one area with too many heavy wefts, especially at the crown where short hair may struggle with the weight. With these techniques, even the shortest TWA can securely hold clip-ins from morning coffee to evening cocktails!
Want more detailed guidance? Check out our complete guide on How to Clip Hair Extensions Into Short Hair. And if you're curious about the science behind protective styling, this research on protective hairstyles offers fascinating insights.
Still have questions? Our community forum has a popular thread on Clip-in Sets on Short Bobs with real experiences from women just like you!
Styling & Blending Techniques for a Seamless 4C Look
The magic moment of wearing clip ins on short 4c hair happens during the blending phase. This is where your change shifts from "obviously wearing extensions" to "wait, is that all your natural hair?" Let's explore how you can create that seamless, head-turning look.

When you're working with a TWA, creating a natural transition between your shorter coils and longer extensions takes a bit of finesse. I've helped countless clients master this blend, and trust me—it's all about technique.
The twist-out blend is my personal favorite starting point. After installing all your wefts, take small sections that combine both your natural hair and the extensions, apply a leave in cream or holding gel, then twist them together. When dry, separate the twists, and you'll see how beautifully the textures marry together, creating that cohesive look we're after.
Your leave-out strategy matters tremendously. Always keep a small perimeter of your natural hair free around your hairline, plus a thin layer at the top to cover all tracks. This natural hair "veil" is your secret weapon—when styled to match your extensions' texture, it creates the illusion that everything is growing right from your scalp.
Color harmony can make or break your blend. If your extensions aren't a perfect match for your natural shade, consider a temporary color rinse on either your natural hair or the extensions. Focus on matching undertones rather than exact shades—this creates dimension that actually looks more natural than a perfect match!
"The first time I tried clip-ins with my short 4C hair, the texture difference was obvious," shares Sherri, one of our regular customers. "Then my stylist showed me how to use curl defining cream on both my natural hair and the extensions. Game changer!"
Fast Everyday Styles
Once your clip ins on short 4c hair are securely installed and blended, you'll want quick styles you can create in minutes.
The five-minute fro is perfect for embracing volume. Simply pick out both your natural hair and extensions with a wide-tooth comb, then use your fingers to shape and fluff. This style celebrates texture while disguising any differences between your natural hair and extensions.
For busy mornings, try the side-sweep style by creating a deep side part and using a few strategically placed bobby pins to secure the heavier side behind your ear. This naturally hides blend points at the roots while looking effortlessly chic.
Headband styles are your best friend when you're new to clip-ins. A cute scarf or decorative headband placed right at the line where your natural hair meets the extensions creates a stylish focal point while concealing any blend challenges.
The half-up top knot works wonders for shorter 4C styles with clip-ins. Gather just the top section (including some extensions) into a small bun, leaving the rest flowing. This trendy look minimizes blend issues while maximizing style points.
For a more defined look, apply curl-defining cream to both your natural hair and extensions, then finger-coil small sections. This creates a uniform pattern throughout that looks incredibly natural.
Glam Styles for Special Occasions
When special events call for something extra, clip ins on short 4c hair give you versatility that would normally take years of growth to achieve.
The updo bun becomes possible even with a TWA! Gather all hair (natural and extensions) into a high ponytail, wrap the length around the base for a bun, then pull out a few face-framing tendrils for softness. This neat style looks completely natural and stays secure all evening.
For something edgier, try a faux hawk by using bobby pins to secure the sides close to your head while fluffing the center strip for height. This bold style naturally conceals wefts while creating a striking silhouette that turns heads.
Crown braids frame your face beautifully. Create a small braid along the hairline, incorporating both natural hair and extensions, then pin in place. This neat frame disguises blend points while adding sophisticated detail to your style.
The beauty of mastering clip ins on short 4c hair is that it gives you styling freedom without waiting years for growth. With these blending techniques in your arsenal, you'll move confidently between styles while keeping everyone guessing about your hair secrets. For more inspiration, check out our guides on How to Blend Curly Hair Extensions and Curly Clip-In Extension Hacks.
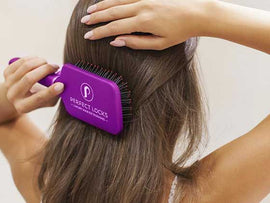
Maintenance, Safety & Growth Tips
Taking care of both your natural hair and clip-ins is essential for maintaining that gorgeous look while keeping your 4C hair healthy. Think of this as protecting your investment – both in your extensions and in your natural hair journey!

I always tell my clients that nighttime is when the magic happens for hair care. Before bed, gently remove your clip ins on short 4c hair – your scalp will thank you for the breathing room! Store them properly and lay them flat in their original packaging to maintain their shape. Meanwhile, wrap your natural hair in a satin bonnet or use a silk pillowcase to prevent friction and moisture loss while you sleep.
Moisture is your 4C hair's best friend, especially when you're using extensions. Each morning, lightly mist your natural hair with a water-based leave-in conditioner. Be careful though – too much product can make clips slip, so use a light hand. For your extensions, a simple refresher spray (water with a few drops of lightweight oil) works wonders between washes.
Even with gorgeous extensions installed, don't neglect your scalp! I recommend doing gentle scalp massages in the evening after removing your clip-ins. This increases blood flow to the follicles, which can promote growth – a nice bonus while you're enjoying your temporary length.
Extension Care
Think of your clip-ins as an investment piece in your wardrobe – with proper care, quality extensions can last 6-12 months or even longer. Wash them every 6-8 wears using sulfate-free products specifically formulated for human hair extensions. Always air dry them completely before reinstalling or storing to prevent mildew or damage.
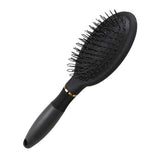
Detangling is crucial for extension longevity. I always start by gently finger-combing to remove any surface tangles, then graduate to a wide-tooth comb if needed. Work from the ends up, just like you would with your natural hair. A light detangling spray can help with stubborn knots without weighing down the hair.
Product buildup is the enemy of beautiful extensions! Keep styling products to a minimum, especially heavy creams or oils that can weigh down the hair and attract dirt. When you do style, opt for lightweight products designed for extensions. And please, keep heat tools away from the clips and wefts themselves – heat can damage the attachment points and shorten your extension lifespan.
Proper storage might seem like a small detail, but it makes a huge difference. Keep your clip ins in a cool, dry place away from sunlight, which can fade the color. Never fold or crease the wefts, as this can permanently damage them. If you're a regular clip-in user, consider investing in a dedicated storage case or hanger – it's worth it to protect your investment!
Removing Clip-Ins Without Breakage
The removal process is just as important as installation when it comes to protecting your natural hair. I always use what I call the "open-clip method" – using my fingers to locate each clip, pressing down on the center to release the spring, then gently lifting away from the scalp. Always work from top to bottom, removing the highest wefts first to prevent tangling.
Before you start removing clips, take a moment to detangle. Gently run your fingers through your hair to separate any intertwined sections. This simple step prevents painful pulling and potential breakage during removal.
After taking out all your clip ins, give your scalp some TLC with a gentle cleansing using a moisturizing shampoo. Follow with a deep conditioning treatment to restore moisture to your natural hair. If possible, give your scalp at least 24 hours to "breathe" between installations – your hair will thank you!
Using Clip-Ins as a Growth-Friendly Protective Style
One of my favorite things about clip-ins is how they can actually support your hair growth journey when used thoughtfully. They provide the low manipulation advantage that's crucial for length retention – you're not constantly styling, brushing, or heat-treating your natural hair.
I recommend creating a simple rotation system for wearing your clip-ins. Maybe wear them 3-4 days per week, then focus on deep conditioning and scalp treatments on your "off" days. This balanced approach gives you styling versatility while still prioritizing hair health.
Use your clip-ins as motivation by tracking your natural hair growth progress! As your TWA grows longer, you'll notice installation becomes easier with less backcombing needed. Eventually, you might even be able to switch from two sets to just one as your natural hair provides more of its own volume.
Think of creating a protective styling calendar around your important events or seasonal changes. Plan "rest periods" for your natural hair between clip-in wears, especially during humid summer months when your natural texture might shine on its own. This intentional approach helps you maximize growth while still enjoying styling options.
With these care practices, both your natural hair and your clip-in extensions will stay in great condition. You'll be able to enjoy all the versatility of clip ins on short 4c hair without compromising your hair health journey. For more detailed care instructions, check out How to Care for Your Clip-In Hair Extensions on our blog.
Frequently Asked Questions about Clip Ins on Short 4C Hair
After helping thousands of clients transform their TWAs with extensions, I've noticed certain questions come up again and again. Let's address the most common concerns about clip ins on short 4c hair that might be on your mind too.
How many packs do I need for a full look?
Two is the magic number for most short 4C styles. Here's why: your TWA simply doesn't provide enough natural volume to blend seamlessly with just one set. When I work with clients in our consultation room, I always recommend two sets to create that perfect fullness.
"I tried one pack first to save money, but ended up ordering a second set the very next day," one customer told me recently. "The difference was night and day!"
Having two sets gives you options - you can create beautiful dimension by mixing different lengths (like pairing 16" and 20" pieces), and you'll have enough wefts to create secure anchor points all around your head. Our sales data shows about 84% of our short-haired customers end up with two sets for a truly satisfying result.
Can I install clip-ins on hair shorter than 2 inches?
Yes! Though I won't lie - it gets trickier the shorter you go. For hair between 1-2 inches, you'll need to become best friends with backcombing and a good strong-hold gel. Apply both at the roots, then hit those sections with a texturizing spray for extra grip.
For true TWA length (under an inch), try my favorite "bobby pin anchor" technique: place bobby pins in a cross pattern directly against your scalp, then clip the weft to the pins rather than your hair. It's a game-changer for ultra-short styles.
I've seen gorgeous changes on even the shortest TWAs using these methods. Just be prepared to check and adjust throughout the day, and consider incorporating headbands or scarves for added security (which look super cute anyway!).
Will clip-ins damage my coils if worn daily?
This is probably the concern I hear most often in our consultation room. The good news: when used correctly, clip-ins can actually be gentler on your natural hair than many other styling methods.
The key word is rotation. Your scalp needs breathing room, so I recommend removing your clip-ins nightly (never sleep in them!) and giving your hair 1-2 completely extension-free days each week. During installation, ensure you're securing clips without pulling or creating tension headaches.
Here's a pro tip I share with all my clients: slightly vary where you place your clips each day. This prevents stressing the exact same hair follicles repeatedly. And always, always open clips fully before removing to prevent snagging and breakage.
Many of our customers report better length retention with clip-ins because they're handling their natural hair less frequently. One client recently shared that her hair grew two inches during six months of wearing clip ins on short 4c hair three times weekly!
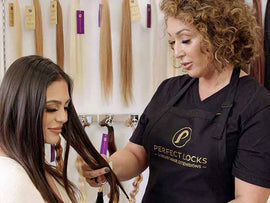
How do I match extension texture to my 4C hair?
Finding your perfect texture match is part science, part art. When shopping, look specifically for terms like "kinky coily," "afro kinky," "kinky curly" or extensions labeled specifically for 4C hair.
Consider how your natural hair behaves when moisturized - does it form more defined coils? If so, look for extensions with a similar pattern. Our Perfect Locks kinky curly clip-ins are specifically designed with fine yet coarse strands in a Z-pattern with subtle low luster to perfectly mimic natural 4C hair.
Whenever possible, request for a texture match. Our team will accurately texture match your 4C pattern when provided a photo of your hair. The density should feel similar too - our 4C extensions contain 113-130 grams per set to match the typically fuller nature of natural 4C hair.
How do I prevent clips from sliding out of my short 4C hair?
Ah, the slippage issue! This is definitely the biggest challenge with clip ins on short 4c hair, but I've helped hundreds of clients overcome it.
Backcombing is absolutely non-negotiable. I cannot stress this enough! Create texture at the roots through gentle teasing before attaching each weft. Then apply a tiny amount of gel or texturizing spray to those backcombed sections.
Here's an insider tip: second-day hair often provides better grip than freshly washed hair. If you're installing for a special event, wash your hair the day before, not the day of.
Pay attention to how you position the clips too. They should sit horizontally or angle slightly downward - never point them upward or they'll work themselves loose. For extremely short sections, smaller wefts (with just 2-3 clips) provide more security than larger pieces.
The quality of your clips matters tremendously. At Perfect Locks, all our clip-ins feature silicone-lined clips that grip much better than basic metal options, especially on shorter textures.
With these techniques, you'll be amazed at how secure your extensions can feel, even on the shortest 4C styles. As one client recently told me, "I went from checking my clips every 30 minutes to completely forgetting they were there!"
Conclusion
Mastering clip ins on short 4c hair opens up a world of styling possibilities while keeping your natural hair healthy and thriving. As we've explored throughout this guide, even the shortest TWA can successfully support clip-in extensions when you use the right techniques and quality products.
The beauty of this change journey is that it doesn't demand permanent commitment, excessive heat styling, or harsh chemical treatments. With premium clip-ins like those we offer at Perfect Locks, you can completely change your look in minutes while still honoring and protecting your beautiful natural texture.
Think about what we've learned together – proper preparation creates the foundation for everything else. When you take the time to section carefully, backcomb gently, and apply the right products, your clip-ins stay secure all day long. And let's be honest – there's something magical about being able to switch from a cute, low-maintenance TWA to flowing locks whenever the mood strikes!
Quality absolutely matters when it comes to extensions. I've seen too many clients struggle with poor-quality hair that tangles easily or doesn't match their texture. Investing in ethically sourced extensions specifically designed for 4C texture makes all the difference in creating a believable, natural look.
What I love most about working with short 4C hair is proving that technique truly trumps length. Even with hair as short as 1-2 inches, you can create secure attachment points with the right installation methods. It's all about working with what you have and knowing the right tricks.
Proper maintenance preserves both your natural hair and your investment in extensions. The care routine we outlined helps ensure your clip-ins last longer while your natural hair continues to thrive underneath. Many of our clients actually report better length retention because clip-ins reduce daily manipulation of their natural hair.
The ultimate reward? Versatility at your fingertips. Master these techniques and you'll have the freedom to express yourself through different styles whenever you choose. Monday might call for your natural TWA, while Friday night might be perfect for some added length and volume.
I encourage you to experiment safely, find the styles that make you feel most confident, and accept the flexibility that clip-ins offer on your natural hair journey. Don't get discouraged if your first installation takes a bit longer – with practice, you'll soon be changing your look in minutes flat.
At Perfect Locks, we're passionate about providing premium, ethically sourced extensions that celebrate your natural beauty. Our kinky curly clip-ins are specifically designed to blend seamlessly with 4C texture, giving you salon-quality results in the comfort of your own home.
We'd love to see your change! Share your before and after photos using our clip-ins and tag us on social media @perfectlocks. And if you have questions about your specific hair needs, our team of texture experts is always here to help.
Your short 4C hair isn't a limitation—it's the perfect canvas for endless styling possibilities. More info about clip-in extensions

Author and Founder of Perfect Locks LLC
Priyanka Swamy, the visionary founder of Perfect Locks LLC, is a passionate advocate for empowering women and promoting cultural diversity. With an unwavering commitment to ethical sourcing and quality craftsmanship, she redefined the hair extension market and created a supportive community that celebrates individuality.
Priyanka's dedication to sustainability and social responsibility continues to inspire positive change within the industry. Her journey with Perfect Locks remains an inspiration, unlocking the true potential and confidence of countless individuals worldwide.