


How to Install Hair Tinsel: 3 Easy Methods
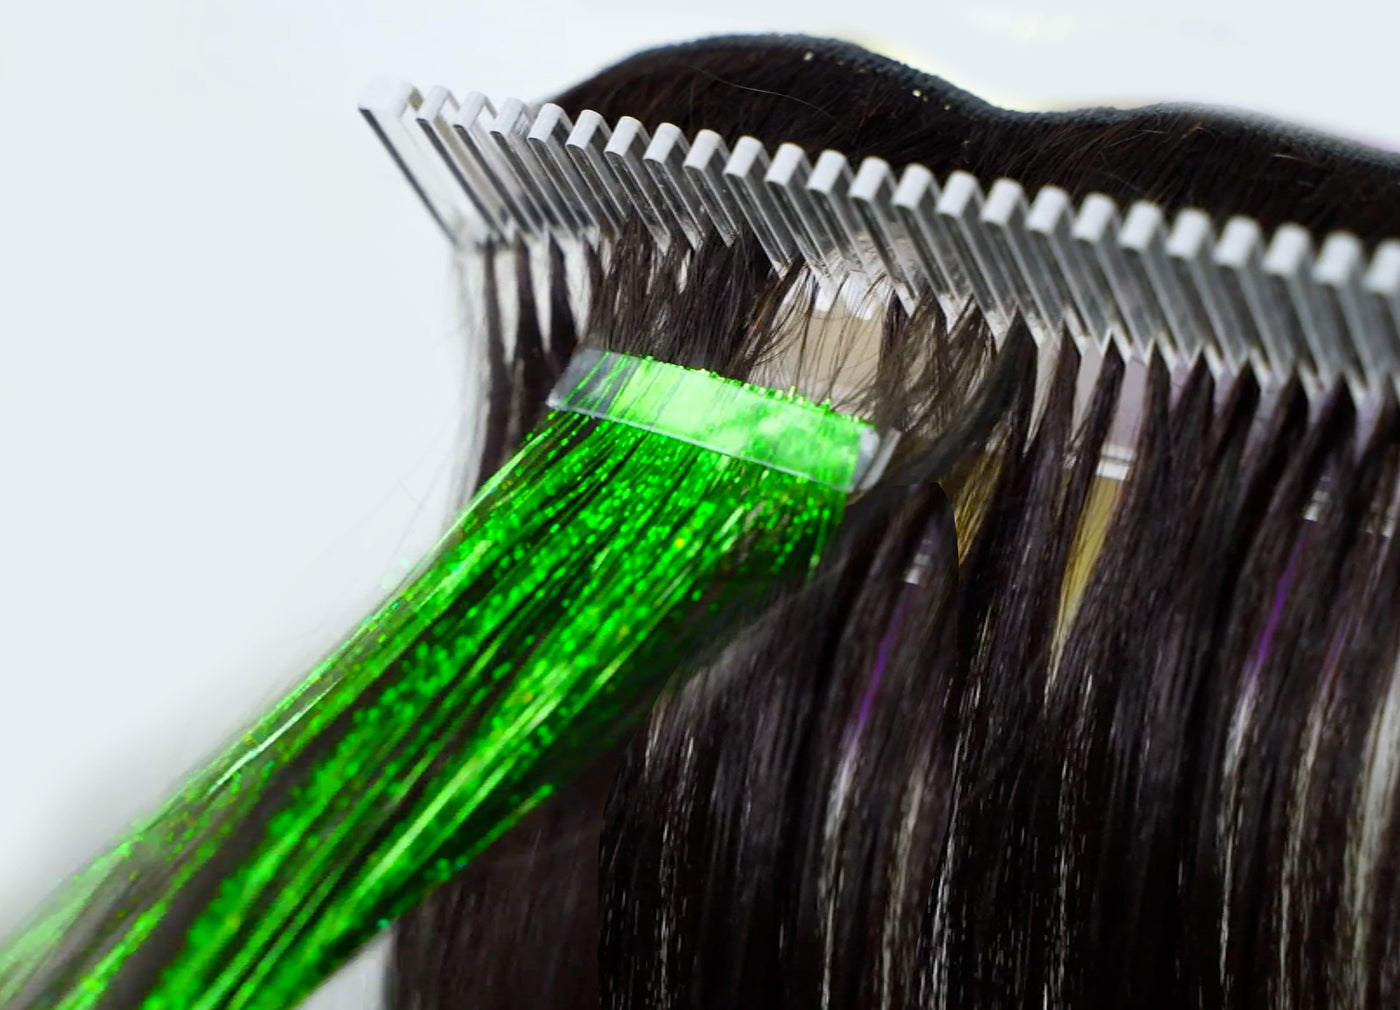
Add instant shimmer to your style with glamorous hair tinsel (also known as fairy hair). In this tutorial, you'll learn how to install hair tinsel three ways - using snap clips, adding it to your clip-in extensions, or using tape tabs for longer wear. Whether you're prepping for a festival, a night out, or just want everyday sparkle, we'll walk you through each method step by step.

Before you start: prep your hair
Start with clean, dry hair - never install tinsel on wet hair. Gently detangle with a wide-tooth comb so there are no knots in the way. If your hair is silky or slippery, add a bit of texturizer or pomade near the root area to help the tinsel grip better.
Next, decide where you want your sparkle. A center part helps with even placement, but you can focus tinsel around the face for subtle shimmer, scatter it throughout for all-over drama, or concentrate it on one side for an asymmetrical look. The strands catch light best where your hair moves most - around layers, the front, and anywhere you tend to flip or tuck your hair.
Method 1: Hair tinsel with snap clips
This method is perfect for temporary looks. Snap clips let you add and remove tinsel in seconds, and you can reuse them again and again. Great for trying out tinsel for the first time or when you only want sparkle for a specific event.
What you'll need
- Hair tinsel strands
- Snap clips (match your root color for a seamless look)
- Hook pulling needle
- Scissors
Steps
- Grab a snap clip and a tinsel strand. Fold the tinsel in half so both ends are even, creating a loop at the fold.
- Use your hook pulling needle to thread the folded loop through the hole in the snap clip.
- Pull the tinsel ends through the loop and tighten to secure the strand to the clip. A double knot helps it last longer.
- Clip into a small section of hair near the root, then trim the tinsel to match your hair length.
Method 2: Hair tinsel on clip-in extensions
Already wear clip-in extensions? This method lets you add sparkle to your extensions instead of your natural hair. The tinsel stays on the weft so you can clip your sparkly extensions in and out whenever you want - no commitment to your real hair at all.
What you'll need
Steps
- Lay your clip-in extensions flat on a clean surface or clip them onto a mannequin head for easier handling.
- Decide where you want tinsel on the weft - near the clips, spread across the middle, or concentrated at the ends.
- Fold a tinsel strand in half. Using your hook pulling needle, loop the folded end around a small section of extension hair and pull the tinsel ends through.
- Tie a small double knot to secure the strand so it won't slide out.
- Repeat across the weft - the more strands you add, the bolder the sparkle.
- Trim to match your extension length, or leave slightly longer for extra drama.
- Install your clip-ins as usual and style with gentle heat if needed.
Method 3: Hair tinsel with tape tabs
Want tinsel that stays in for weeks without worrying about it? Tape tabs give you the most secure hold of all three methods. This is the way to go for vacations, multi-day festivals, or just everyday shimmer you don't have to think about. If you're familiar with tape-in extensions, the concept is similar.
What you'll need
Steps
- Cut your tinsel strands to the desired length.
- Peel the backing off one tape tab and lay a few folded tinsel strands (folded in half) across the sticky side.
- Press a second tape tab on top to sandwich the tinsel between the two tabs.
- Part your hair and press the tape sandwich close to the scalp, making sure it lies flat.
- Press and hold for a few seconds to secure. Avoid washing or heavy styling for 24-48 hours while the adhesive sets.
- Trim the tinsel to blend with your hair length.
Which method is right for you?
Best for quick, temporary sparkle
- Snap clips - clip in and out in seconds, reusable, no commitment. Best if you want tinsel just for one event or to try it out.
Best for longer-lasting wear
- Tape tabs - lasts 4-6 weeks, survives washing and heat styling. Best for festivals, vacations, or everyday shimmer.
Clip-in extension method is the best of both worlds if you already wear extensions - semi-permanent sparkle that comes off when your clip-ins do, with zero impact on your natural hair.
Hair tinsel care tips
One of the best things about tinsel is how low-maintenance it is. Here's what to know:
- Heat styling - Our tinsel is heat-safe up to 350 degrees, so you can curl, straighten, and blow-dry without worry. Just avoid clamping your flat iron directly on the knot or tape attachment point.
- Washing - Wash your hair as normal. Be gentle around attachment points, but tinsel handles shampoo and conditioner just fine.
- Brushing - Brush gently through tinsel strands the same way you'd brush your natural hair. Use a wide-tooth comb or detangling brush if you're prone to tangles.
- Sleeping - No special care needed, but a loose braid or silk pillowcase helps extend the life of any attachment method.
- Removal - For snap clips, just unclip. For tied-in strands, slide the knot down and off the end of your hair, or cut the tinsel strand with small scissors. For tape tabs, use an adhesive remover or gently peel. Your natural hair stays completely unaffected.
How long does hair tinsel last?
It depends on the method and how you care for it:
- Snap clips: As long as you want - clip in, clip out, reuse indefinitely
- Tied-in (slip knot): 1-4 weeks, depending on how secure the knot is and how much you handle your hair
- Tape tabs: 4-6 weeks with proper care
- On clip-in extensions: As long as the extension lasts - the tinsel stays until you remove it
Tinsel naturally sheds a few strands over time as your hair's growth cycle loosens the attachment points. Most people add a few fresh strands as older ones fall out. It's normal and nothing to worry about.
Ready to add some sparkle?
Hair tinsel is one of the easiest, most fun ways to upgrade your look - no salon visit required. Pick your method, grab your tinsel kit, and start shimmering.


Not sure where to start? Our Hair Tinsel Starter Kit comes with two packs of tinsel and a wooden loop wand, so you have everything you need in one bundle. And if you want tinsel you can pop in and out without tying anything, our Clip-In Tinsel Kit makes it even easier.
Tag @perfectlocks on Instagram when you install yours - we love seeing your sparkle!